Showing posts with label breakfast. Show all posts

Wednesday, October 29, 2014

Chocolate Gravy


What was your reaction when you read the words chocolate gravy?  If it was, "Ohmygawd, YES!!!", I'm guessing you're from the South.  If it was, "Whaaaa?", then you're probably from north of the Mason-Dixon line, at least in a cultural sense.  If you're in the perplexed group, let me enlighten you.

My husband's family is mostly from Oklahoma originally, and then eventually settled in Arkansas.  They have taught me some interesting things about food with a Southern influence--some of which I've liked (like this chocolate gravy), and some I didn't care for (like hominy casserole and pickled okra).  Luckily, my father-in-law keeps plenty of good Scotch around to wash down the stuff I don't like.  


When we would all meet up in Arkansas near my in-law's house, sometimes Marc and I and my sister-in-law's family would go out for breakfast at a little diner right by Bull Shoals Lake called Connie's.  This was always a really special treat.  On one particular trip to Connie's my sister-in-law, Leah, ordered chocolate gravy, and I almost gagged when the words came out of her mouth.  The only gravy I had ever eaten at breakfast was sausage gravy, and when my brain tried to imagine chocolate gravy, I envisioned some kind of horrible half sweet, half savory abomination of chocolate and sausage together.  She quickly corrected me and said, "it's like eating warm chocolate pudding for breakfast."  Turns out, eating warm chocolate pudding for breakfast is a-ok with me.  Thank goodness Leah was there to school me.  And thank goodness not all Southern food tastes like pickled okra.


Chocolate Gravy

3/4 cups sugar
1/3 cups cocoa  (I highly recommend Dutch-processed cocoa; I like Penzey's brand)
3 Tbs. flour
4 Tbs. (1/2 stick) butter
2 cups milk (whole milk is best)
1 tsp. vanilla extract
pinch of salt

Whisk the sugar, cocoa and flour together in a bowl and set aside.  Melt the butter in a nonstick skillet over medium heat.  Add the cocoa mixture to the skillet and stir until well mixed with the melted butter.  Cook for a minute or so to let the cocoa bloom.  Slowly whisk in the milk and turn up the heat.  Cook, stirring or whisking constantly, until thickened.  Off heat, stir in the vanilla and salt.  Serve warm over biscuits.


Monday, September 24, 2012

Apple Cake


It's officially fall now, and you know what that means?  Apples!  You know what else I love about fall?  Cakes!  Fall and winter are prime cake baking time because it's finally cool enough to actually enjoy having the oven on, and the cozy feeling that comes with it.  As opposed to summer when, unlike my parents, I will indeed turn my oven on, but when I do, I'm often chased into the basement to get some respite from the heat.  To recap, 2 great things about fall: apples and cake.  There is an obvious next step staring us in the face here, and it's called apple cake.


There must be some kind of apple cake high council that met long ago and ratified the master version of this recipe, because the many variations I encountered were all basically the same at their core.  The amount of oil, sugar, eggs and flour was very similar from one to another.  I saw one that called for half butter and half oil.  I saw a few that called for a bit more flour or a bit less apples than I used.  A few contained nutmeg in addition to or in place of cinnamon.  One more contemporary version called for serving a butterscotch sauce on top, which seemed cloyingly sweet and unnecessary to me.  I love butterscotch as much as the next girl, but do you want to taste the apples or not?  And there was one that called for canned apple pie filling, which is an absolute travesty any time of year, but especially now.  In the end, I went with a version that my mom has always made and has been in her recipe file for decades.  Since it is very similar to most of the recipes I found, and because it was always so good, I changed absolutely nothing.  Who am I to argue with the National Association for Apple Cake Integrity?


Apple Cake

As you can see, I used a 9 x 13 pan, but my sister-in-law makes a similar recipe and uses a Bundt pan.  I like to make a foil liner for the pan when I make a snack cake like this so I can lift the entire cake out of the pan to cut it.  That way I don't scratch up my bakeware with a knife.  I used Granny Smiths because their tartness complements the sweetness of the cake nicely, but the choice of apple is obviously up to you.  The batter will be very thick; it's almost more like a cookie dough than a cake batter.  You will need to smooth it out into an even layer before baking.  I served mine for dessert along with coffee or milk, as the diner preferred, but it was great the next morning for breakfast, too.  Also works well as just an anytime snack. 

2 1/2 cups all purpose flour
1 tsp. baking soda
2 tsp. baking powder
1 tsp. salt
1 tsp. cinnamon
2 cups sugar
1 cup oil
2 eggs
2 tsp. vanilla
3 cups apples, peeled and chopped (if using Granny Smiths, this is about 2 or 3 of the jumbo ones, or 4 to 5 smaller ones)
1 cup pecans, toasted and chopped (optional)

Preheat the oven to 300 degrees.  Prepare a 9 x 13 baking pan by lining with foil and spraying the foil with vegetable oil cooking spray, or leave out the foil and grease and flour the pan.

In a medium bowl, combine the flour, soda, baking powder, salt and cinnamon and whisk until well mixed.  Set aside.

In a large bowl, whisk together the sugar, oil, eggs and vanilla.  Add the flour mixture and stir until just combined.  Add the chopped apples and nuts, if using, and fold into the batter.

Pour the batter into the prepared pan, making sure to spread it out into an even layer and into the corners of the pan.  Bake for 1 hour at 300 degrees.  Allow to cool before slicing.


Sunday, November 13, 2011

Cinnamon Sugar Cake Doughnuts


I started seeing an acupuncturist recently, which is a really interesting experience.  I don't know why it is that having needles shoved into your ears and forehead is relaxing, but trust me, it is.  Anyway, one of the first things she told me was to think about going gluten-free and dairy-free.  So what did I do?  I went home and thought about it while I made doughnuts.  After taking my first bite, I decided I had thought about it enough.  Honestly, I'm pretty sure I wouldn't even know how to eat gluten-free, but I know for sure it means no doughnuts.  To which I say, no deal.

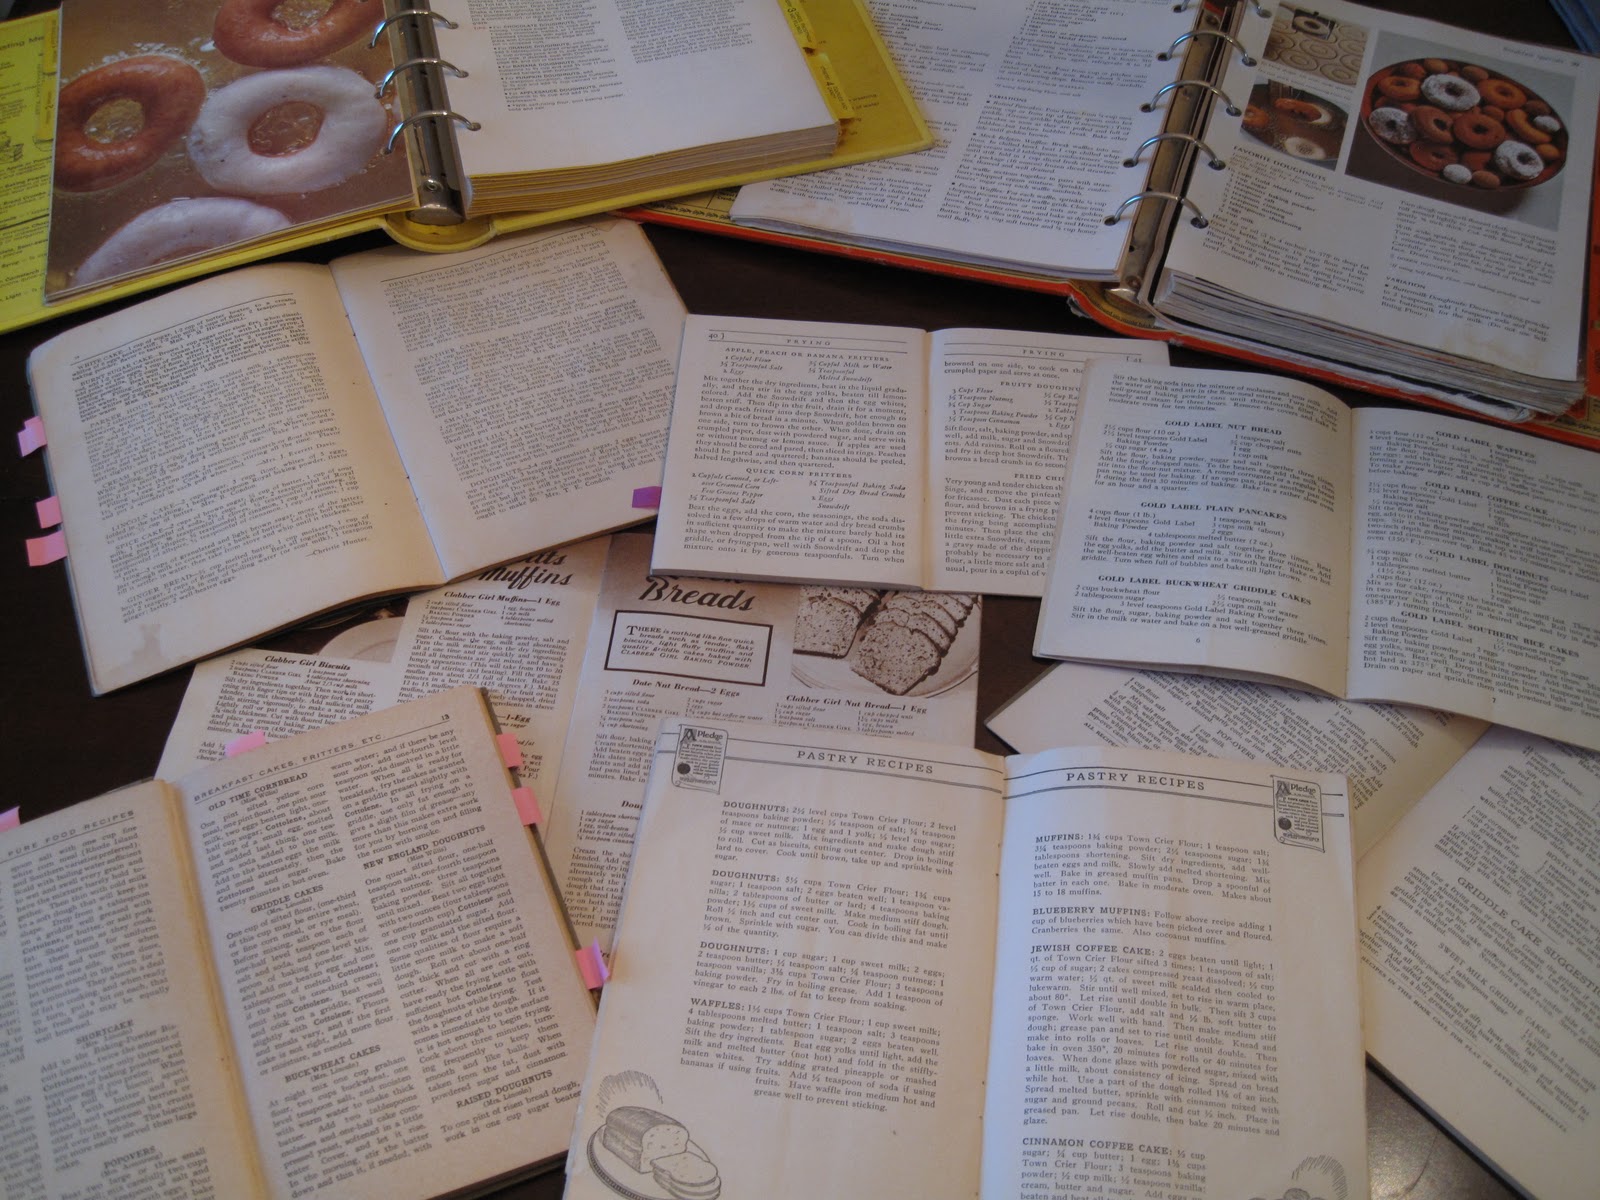
Our ancestors LOVED them some doughnuts.  Like, really loved them.  At least, I assume they did because almost every single old book in my collection has a minimum of one doughnut recipe.  Most have more than one including at least one cake doughnut recipe and one yeast.  (By the way, if you're wondering why I'm spelling it doughnuts as opposed to donuts, it's because all my old recipes spelled it that way, so it's my homage to those early 20th century cooks.  Ah, the good old days before laziness had even invaded the way we spell things.)  As visual proof of the plethora of doughnut recipes, here's a picture of all my books open to the doughnut page, and this doesn't even include the recipes on my computer from the books that I scanned before I returned them to their rightful owners.


This picture also gives you an idea of where I start with each recipe I work on.  (Recipes from my Grandma are the exception because I just take her original and go from there.)  But generally I get all my old books out and find as many versions as I can of what I want to work on and start cherry picking my favorite ideas from each one, and that was what I did here.  It's especially helpful with these old recipes to have lots to work with because so many of them are so vaguely worded that it really helps to be able to compare them against each other when one calls for "an amount of butter the size of an egg," or to "mix in enough flour to make a stiff dough."  I'm a scientist!  Give me measurements, dammit!  I'm still trying to figure out what it means when they say, "mix all ingredients as for a good cake."  I see that more often than you'd realize.  What do they mean?  Did they ever mix up bad cakes?


There's certainly no bad cake here.  Up to this point, the only doughnuts I had ever made on my own were baked in a doughnut pan with a Stonewall Kitchen mix.  While they are very good, I don't exactly consider them homemade.  They are homemade in the same way that Hamburger Helper is "making dinner."  (Marc can tell you that I laugh sarcastically every time we see that commercial and the people act like they are heroes for throwing some ground beef in a pan with a packet of powdered cheese.)  Stonewall Kitchen's tasty mix notwithstanding, I've now come to the realization that it's really hard to beat a light, cakey doughnut hot out of the oil with a little bit of a crusty exterior.  And given that they are so easy to throw together, why not make your own?

Homer Simpson once asked, "Doughnuts: is there anything they can't do?"  They sure can't make me want to give up gluten.


Cinnamon Sugar Cake Doughnuts

This recipe as written makes about 6 or 8 doughnuts.  I was afraid to make any more than that because I knew Marc and I would have eaten all of them, no matter how many there were.  It should be very easy to double if you want to make a full dozen.  Also, the dough keeps very well in the fridge.  Marc and I made 3 to split for breakfast one morning, then fried up the remaining dough the next day.  There was no difference in the ones that were made from fresh dough and the ones that were made after the dough had been refrigerated.


1 1/2 cups flour, plus a little extra as needed
1/4 tsp. ground nutmeg
1/2 tsp. cinnamon
1 tsp. baking powder
1 tsp. baking soda
1/4 tsp. salt
1 egg
1/2 cup sugar
1 Tbs. melted butter, cooled
1/4 cup buttermilk

Topping

1/2 cup sugar
1 tsp. cinnamon

Whisk together flour, salt, baking soda, baking powder, cinnamon and nutmeg.  Set aside.  Mix the topping ingredients together in a wide, shallow bowl and set aside.  Begin heating about an inch of oil in a Dutch oven.  Put it on a low heat while you mix up the dough.

In a medium sized bowl, beat the egg.  Whisk in the sugar, melted butter and buttermilk in with the egg.  Stir in the flour mixture.  If the dough is very sticky, add more flour, 1 Tbs. at a time, and stir into the batter until it is not too sticky to roll out.  This amount will depend on how much moisture is in your flour and your kitchen in general.  It ended up being 2 Tbs. in my case.

Lightly flour a work surface and pat the dough out into a circle about 1/4" thick.  Remember to occasionally check to make sure it's not sticking to the work surface; add flour as necessary.  Use a doughnut cutter or a couple biscuit cutters to cut out doughnuts and holes.  I used a 3 1/2" biscuit cutter for my outer circle and about a 1 1/2" cutter for the hole.

Boost the heat up on the oil until it reaches 350 degrees.  Carefully pick up the cut out doughnuts with a spatula and slide into the oil.  Fry the doughnuts until golden brown on both sides, about 1 to 1 1/2 minutes per side.  Remove from the oil and drain on paper towels.  Immediately roll in the cinnamon sugar mixture. 

Tuesday, October 11, 2011

Open-Faced Egg Sandwich


So right after school was done kicking my butt (or at least the kicking had slowed down), my medical appointments started kicking my butt.  I've been off my feet a lot lately by doctor's orders, which means there's been much less cooking going on in our house than usual.  Actually, what's really been going on is probably something akin to what happens every week in Laura's house, where I made a big potful of something and we ate out of it for several days in a row so that my husband wouldn't have to work too hard to get dinner on the table.  This was self serving, too, because it also meant I didn't have to tell my husband what to do to get dinner on the table.  Sometimes that's almost more exhausting than just doing it myself, even though he means well.  :)  Luckily I've been sitting on this recipe for a while, so while I'm hanging out here on bedrest, or couchrest, as it were, for the remainder of the day, I thought I might as well share it.


I've mentioned before how much Marc and I love to have a big, guilty pleasure breakfast on the weekends, but besides things like sweets and simple carbs - coffee cakes, doughnuts, griddlecakes, etc. - most of my old cookbooks don't have much to offer as far as breakfast recipes.  Marc would always prefer to have a lot of protein in his big weekend breakfast, especially if that protein is in the form of bacon.  And cheese.  And eggs.  And then more bacon.  After a lot of paging through old books, I did find a few breakfast casserole and strata recipes, but it's nearly impossible to make something like that for 2 people, and I wasn't interested in eating it forever.  A little more scouring revealed several breakfast sandwich and scrambled egg recipes in a few old books from around the 30s and 40s.  One scrambled egg recipe contained oysters.  Another contained sauteed corn.  I decided I didn't know how to modernize something that sounded quite that repulsive, but was glad to hear that people were scrambling eggs back in the day because I knew I could work with that.  One book had a recipe for an egg sandwich and eggs benedict on the same page and hence the idea of an open-faced egg sandwich crept into my head.  That, plus the memory of a great meal at a bed and breakfast in the Poconos a few years ago created this tasty dish.  At this particular bed and breakfast, the scrambled eggs had herbs and a hint of garlic in them, and in this case, I actually gave in to a convenience product to get that same effect.


Open-Faced Egg Sandwich

I made this as 2 servings, but you would need to be pretty darn hungry to eat the whole thing.  Marc didn't have much trouble finishing his, but I could have probably shared mine with someone, especially if we'd had a little fruit salad or something like that to go along with it.  (As it was, the dog was happy to help me finish it.)  So I guess the point is it's probably not enough for 4 people as is, but a little more than needed for 2.  If you're interested in trying to make croissants from scratch, good on ya'.  I haven't tried that yet and luckily the grocery store bakery does a fine job of doing that for me.

2 croissants
1 Tbs. butter
4 eggs
1/8 tsp. salt
1/8 tsp. pepper
2 Tbs. soft cheese spread with garlic and herbs (I used Alouette Garlic and Herb Light)
4 strips thick cut bacon

Lay the croissant on the counter and place your palm flat on top of it.  Use a bread knife, held parallel to the counter, to cut each croissant in half horizontally.  Melt the butter in a 12-inch nonstick skillet until no longer foaming.  Place all 4 croissant halves, cut side down, in the skillet and cook over medium heat until they are nicely crisped.  Remove from the skillet and set aside.

In the now empty skillet, cook the 4 strips of bacon to desired crispiness and drain on paper towels.  Cut each slice in half.

Beat the eggs along with the salt and pepper.  Drain the grease from the bacon out of the skillet and pour in the egg mixture.  Add the 2 Tbs of cheese but do not just throw in 2 big gobs.  Spread it out around the pan so it can melt into the eggs evenly.  Scramble the eggs to desired doneness.

On each plate, place a bottom and top of a toasted croissant and place 2 of the halved strips of bacon on each piece.  (So each of the 4 croissant pieces will be covered with one piece of bacon, except that the bacon strip has been cut into 2 halves.  Got it?)  Evenly divide the scrambled eggs over all 4 croissant halves and serve immediately.

You will need a fork to eat this; you can't really pick it up.

Sunday, August 28, 2011

Bacon Cheddar Quiche


Besides cocktails, another great thing about the weekend at our house is breakfast.  Marc and I are both everyday breakfast eaters, but of course through the week we try to stick with things like high fiber cereal and granola.  When Saturday morning rolls around, it's always good to indulge in some custardy french toast made from challah bread, some homemade buttermilk pancakes with Stonewall Kitchen's butter pecan syrup, or a bunch of eggs and cheese with a side of crispy hash browns.  This Saturday was an eggs and cheese day.  And because we had an open package of bacon in the fridge, there was no question that it would also have to be incorporated into whatever we made.

The weekend is also the only time I allow myself to indulge in coffee.  Why is coffee an indulgence, you might ask?  It's not the caffeine.  I actually drink decaf.  It's because in order to stand the taste of coffee, the only way I will drink it is if it's so loaded with cream and sugar that the coffee flavor is kind of an idea, hidden somewhere in the background.  When I'm the barista, coffee is about a thousand calorie affair, so, as my sister-in-law tells her children, it's definitely a "sometimes" food, not an "everyday" food.  So what could go better with a steaming hot mug full of vanilla caramel creamer, sugar and a splash of coffee than a beautiful slice of quiche?


Most quiches I've had use gruyere as the cheese, which I absolutely love.  But gruyere is expensive, and I don't typically keep it in the house.  I had cheddar and some green onions on hand, and since both go well with bacon, the answer seemed pretty obvious.  I kept the custard portion of the dish pretty standard.  I did make it very rich, using a full cup of heavy cream and another cup of skim milk, which is slightly fattier than 2 cups of half-and-half.  You could absolutely use the 2 cups of half-and-half, but I would not cut back on the fattiness of the dairy anymore than that or it might get watery and weepy.


Those who know me well might be shocked to learn that I actually used a pre-made refrigerated pie crust for this quiche.  This was partly because I don't really enjoy making pie crust from scratch, partly because I had a crust that had been hanging around for a while and needed to be used, and mostly because I wanted to be able to eat my breakfast before dinner time rolled around.  Often if you use a pre-made crust (and sometimes even when you make one from scratch) and bake it for a little bit first before the filling goes in, you might end up with cracks in the crust.  The best way I've found to deal with this is to brush a little bit of beaten egg on the cracks while the crust is still hot, and that should seal the cracks up pretty well.  You can even throw the crust back in the hot oven for a few minutes to really make sure that egg sets up before you add your pie filling.  If you don't take this easy step, your filling will run underneath the crust and your pie or quiche will stick to the pie pan and become a giant, ugly mess.  (No, I've never had this happen, why do you ask?)  You might have already noticed in the picture above a fault line in the side of my crust that was somewhat akin to the San Andreas.  Even that crack sealed up nicely with a few generous coats of egg.

I should warn you that this is not a good thing to make if you're hungry right now.  The crust needs to bake on its own for a little bit, and then the quiche bakes for nearly an hour, followed by an hour of cooling.  It is a great brunch dish, though, and if you're not starving, it's kind of nice for one to slowly sip and enjoy her calorie intensive coffee while it bakes, or, say, run to the farmer's market while it cools.


Bacon Cheddar Quiche

Please do not be tempted to skip the cooling part of this recipe or your eggs will run all over.  I was using a very deep pie dish.  If yours is a bit more shallow, you may have too much filling.  Remember, eggs tend to souffle, so don't overfill!  If you have a pie crust shield (see mine in the photo above) this is a great place to use it.  Bake the crust for the first 20 to 25 minutes without the shield on, then add the shield after you put the quiche filling in the crust.  I think it really helps keep the crust from getting too dark, since it's in the oven for such a long time when all is said and done.  My husband claims this would be even better with some mushrooms as well, but because of my aforementioned hatred of them, I'll let you figure that out on your own.

pie dough for a single crust pie, pre-made or make your own

2 green onions, chopped
4 slices thick-cut bacon, diced
1 large garlic clove, minced
5 eggs
1 cup heavy cream + 1 cup skim milk, or 2 cups half-and-half
1/4 tsp. salt
1/4 tsp. ground black pepper
1 cup shredded cheddar cheese

Preheat the oven to 350 degrees.  Fit the pie dough into a pie plate and finish the edges as you like.  Place 2 layers of heavy duty foil in the pie plate and fill with pie weights or a bunch of pennies.  This will keep the empty pie crust from slumping into the pie plate as it bakes.  Bake the pie crust for about 20 to 25 minutes, until it's just slightly colored.  Remove the layers of foil and pie weights.

While the crust is baking, cook the bacon in a 10" skillet over medium-high heat.  Once the fat has begun to render and the bacon is beginning to crisp, pour off most of the fat, leaving a small amount in the pan.  Add the green onions and cook for several minutes until softened.  Add the garlic clove and cook until fragrant, about a minute.  Remove the bacon, onions and garlic from the heat and set aside.

Whisk the eggs, milk, cream, salt and pepper together in a 4 cup or larger liquid measuring cup.  Set aside until the crust is done baking.

Once the crust is done, sprinkle the bacon/onion/garlic mixture evenly across the bottom, then sprinkle the cheese over the bacon mixture in an even layer.  Give the egg mixture one more quick whisk and then slowly pour it into the crust. 

Bake for about 45 minutes, or until a knife inserted about an inch from the edge of the crust comes out clean.  Let cool for at least one hour.  A sprinkling of fresh chives on each slice is pretty and tasty!