Monday, September 19, 2011

Chicken and Dumplings

The recipes I have for chicken and dumplings aren't antiquated, gross, or in need of updating.  The problem is that one of them needs some fancying up, and the other is too damn much work.

America's Test Kitchen has a fantastic chicken and dumplings recipe.  If you have all day to make dinner and have random 1/2 cups of chicken stock on hand, I highly suggest you seek it out.  If you're like me and hate cleaning splattered chicken grease off your stove and want to be able to kill some zombies and do some laundry on your Sunday afternoon, then this one is for you.

The biggest thing I am cutting out of the ATK recipe is browning the skin-on chicken thighs in multiple batches.  This would be the grease-splatter phase.  Undoubtedly it gives you a deeper flavor, but most of the time I'm willing to trade it in for ease.  (If you are trying to impress someone, brown those thighs.)  Instead I threw my thighs straight into the broth, and it was just fine.  Plus, the little city market I go to doesn't have a huge selection, so skin-on bone-in isn't an option for me unless I go to multiple stores, which I won't do.  Unless I need booze.  Then I'll do it.

The other disagreement I have with ATK is that they use drop dumplings.  My mom always made rolled dumplings, so I find the drop variety weird and kind of gross.  So hey, I guess there was something gross in here after all.  The rolled dumplings should be cooked in their own big pot of water though, because there's not enough liquid to cook them in the main pot.  If you are tempted to try this, let me tell you that you will end up with no dumplings and a really thick floury stew.  It's not *bad* exactly, but it sure as hell isn't dumplings.


However, the drawback of my mom's recipe is that it's pretty much what it says on the tin: chicken, and dumplings.  So in my constant battle against scurvy and vitamin deficiencies, I use the celery, carrots, and peas of the other recipe, but in greater (and standardly-packaged) quantities.  I have problems with recipes that call for less than the standard measure of ingredients, so I usually add or subtract until it's convenient.


Chicken and Dumplings

1 1/2 - 2 lbs trimmed boneless skinless chicken thighs
1 large onion, chopped
2 ribs celery, chopped
1 lb carrots, chopped
4-6 Tbsp flour, depending on how thick you want your stew
1/4 cup dry sherry
4 cups (2 lbs) chicken stock
1/2 cup milk
1 1/2 teaspoon fresh thyme, minced (or half quantity dried)
2 bay leaves
1 lb frozen peas
1/2 cup fresh parsley, chopped
salt and pepper to taste

Dumplings:
3 cups flour
4 tsp baking powder
1 1/2 tsp salt
1/3 cup chicken fat, skimmed from stew (alt: vegetable oil)
1+ cup milk

Saute onion and celery until the onion softens and starts to become transparent.  Add liquid ingredients, thyme, bay leaves, flour, and chicken thighs.  Simmer for one hour.

After an hour, add the carrots and skim as much fat off as you can.  Reserve the fat, just dump it right into your measuring cup and try to get at least 1/3 of a cup.  It's ok to get a little stock or thyme in there.  If using chicken fat grosses you out, substitute vegetable oil.  Also, start a large pot of water to boil for your dumplings.

Dumplings:
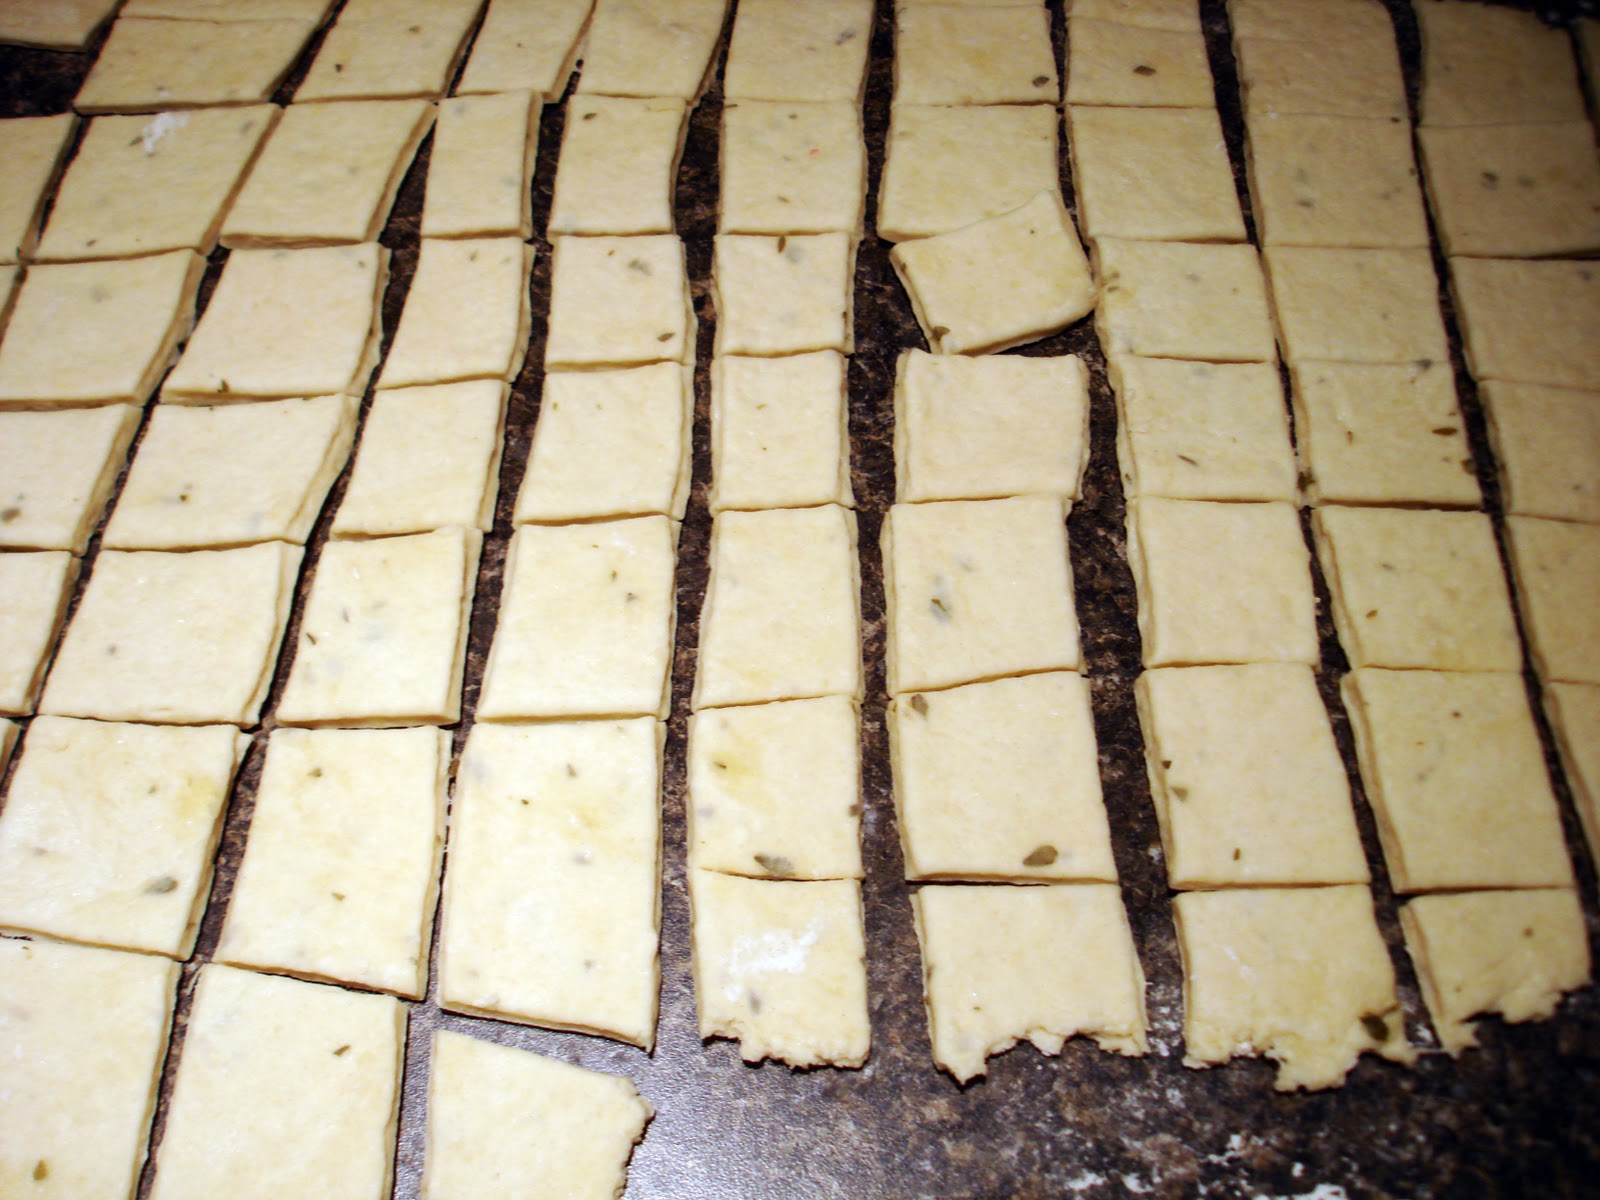
Combine dry ingredients in a large mixing bowl and stir together.  Add milk to your reserved fat until you have 1 1/3 cup liquid.  Stir into dry ingredients, adding more milk if needed.  Dough should hold together but not be wet.  Roll out 1/8" thick and cut into 1" squares.  Boil until they sink, about 15-20 minutes.

While the dumplings are cooking, remove chicken thighs to a plate or bowl and shred using two forks.  Add back into stew.  When dumplings are done, check carrots for doneness.  If they're ready, add dumplings directly to stew.  If not, drain them and let them hang out until the carrots are cooked and then add.

Remove from heat and add peas, parsley, and salt and pepper to taste.  Let sit until peas have come up to temperature, then tuck in.

Serves 6-8.

Sunday, September 18, 2011

Cocktail Night! - Brandy Alexander and Setting up your Home Bar


I'm on some medication right now that has to be taken by injection.  So far it hasn't really been a problem because Marc gives me the shots, and as long as I don't actually witness a needle piercing my skin, I don't have a problem with shots.  Well, I should have known this was coming someday, but Marc had to go out of town this weekend and I therefore had to give myself my own shot.  I practiced for a couple nights before he left so that he could catch me if I passed out, or hold my hair back if my stomach got a bit (ahem) unsettled.  It turned out to be fairly anticlimactic, but I was still terribly proud of myself for conquering that fear.  So on Saturday night when Marc was gone and I had to draw up my own injection and give myself the shot all by little old lonesome, I formulated the following if-then statement:

IF I successfully give myself my own shot, THEN I will have earned the right to eat a chocolate cupcake for dinner.

This is how my brain works.  Even my rewards are food-based.  And you have to admit, this is a pretty damn good prize.


You know what goes great with a decadent chocolate dessert?  Brandy Alexander.  This drink is another classic (circa early 20th century, I believe) that really doesn't need much tweaking because it's really good as-is, but I couldn't help myself from making a couple changes.  Speaking of as-is, the original version contains dark creme de cacao, heavy cream, and either brandy or cognac (which is just brandy made in a specific area of France).  To be honest, I've never tasted cognac and brandy back to back so I have no idea what subtle differences there are in the tastes.  I just keep brandy in my collection, and not even anything particularly top shelf.  I don't use it a whole heck of a lot, so just a cheapy, basic brandy suits me just fine.  I also don't have dark creme de cacao, just light, so that was what I used.  The major change I made was to substitute the heavy cream with ice cream, to make it even more creamy, cold and luscious.  Topped off with the traditional sprinkle of fresh ground nutmeg, it was seriously yummy, and not unlike having a nice cold glass of milk with my rich, chocolate cupcake.


Brandy Alexander

I would highly suggest chilling your cocktail glass in the freezer first, but of course that is optional.  I have one of those little Magic Bullet blenders and it is great for drinks like this where you aren't making a ton of stuff and don't want to get out your big blender.

1 scoop vanilla ice cream
1 oz. brandy or cognac
1 oz. creme de cacao
nutmeg

Combine all ingredients in a blender and blend until very smooth and creamy.  Pour into a chilled cocktail glass and garnish with a sprinkling of freshly ground nutmeg.


And now it's time to attend the Alcohol Academy.  Gather round, my cadets, and I shall tell you which things I find to be essential in my bar.  This came about because my good friend, Kriste, is setting up a new house and she asked my opinion about how to put together her home bar.  She suggested maybe I blog the answer so that others who might be wondering the same thing can also be schooled.  So here are some of my favorite items that I use a lot.

Gadgets


There is a plethora of gadgets and tools you can buy for your bar, but I have just a few that I really use a lot.  First off being the shaker.  Ours is Calphalon brand and it works great.  It never leaks, and the holes are big enough that you don't end up with liquid sitting on top of the shaker from the surface tension.  Plus it looks pretty.  You can also buy a Boston shaker, which is the kind with the metal and glass halves that fit into each other for shaking, and the kind I believe real bartenders prefer.  You'll also need a separate strainer in that case.  I prefer my cobbler style shaker because, as we discussed, I am not a real bartender.  Our shaker also came with the jigger you see which measures 3/4 oz on one side and 1 1/2 oz on the other side.  Marc likes to use the jigger but I almost never use it.  I like to use the little measuring glass you see there.  It measures up to 4 oz and also has markings for Tablespoon, teaspoon and mL measurements.  One tool I would never give up is the citrus squeezer.  You just cut your citrus in half, place it cut side down and squeeze.  It lets the juice through while keeping the pulp and seeds contained.  I use it constantly in the kitchen for cooking and cocktails.  You can get ones even bigger than the one in the picture that supposedly fit oranges.  The last essential tools are a sharp knife and a cutting board.  In my opinion, you can get away without having anything else and still make great drinks.

Glasses


Without a doubt, the glasses we use the most are the old fashioned glasses (small one in the left foreground).  These are short glasses with a big, heavy base and usually around 6 to 8 ounces.  Ours are a little bigger than that, so we just compensate by not quite filling them up all the way when the directions are to "top up."  The second most commonly used glasses in our arsenal are the cocktail glasses (one in the foreground on the right and the background on the right).  These are the ones that people tend to think of as martini glasses.  We tend to use the stemless ones because we think they're cool looking and because they have a good, heavy base.  The tall ones are really fragile, and we've already had one break in our last move, so they don't get used as much as the little ones.  Margarita glasses are easily done without, in my opinion.  They are indeed nice to have if you're drinking margaritas, but it's not like you can't put your margarita in a highball glass.  Speaking of which, the highball is the one in the background left and we use those fairly often as well.  They are typically around 10 or 12 ounces.  Again, ours are a little big but that can be worked around.

Mixers and Garnishes


Lemons and limes are crucial.  I always keep them on hand, and in the cases when I happen to run out, their absence is felt immediately.  Juices are another great thing to keep on hand, particularly cranberry and pineapple.  I like to have oranges occasionally, but I don't use them quite as often as lemons and limes.  As far as sodas (or "pop" as they say around the KC area) I always keep cola and a white soda on hand, and I vastly prefer 7 Up over Sprite and Sierra Mist because it's not as sweet.  Grenadine, cream of coconut and maraschino cherries are nice to have on hand, too, and certainly not that big of an investment.

Alcohol


And now the important part!  If I had a tiny apartment or a tiny budget, my bar would consist of the following: Triple Sec, vodka, rum, gin, tequila, and bourbon or whiskey.  You can make a lot of stuff from this limited selection, and you don't have to spend a lot of money.  Bombay Sapphire and Knob Creek aren't cheap, but you can get something of lesser quality and be fine if you're goal is mixing.  My picture just represents what I have in my collection.  If you want a good sipping bourbon though, the Knob Creek is really good.  I really prefer 100% agave tequila, but just a regular old bottle of gold tequila can work just fine, too.

And there you have it!  I could go on and on, but these are some basics that can get anybody started.  Especially you, Kriste.  :)

Sunday, September 11, 2011

Apple Roll


Would you like a piece of apple roll?  I'll answer for you.  YES.

Fall is just a few weeks away and I freaking love fall.  The crisp, cool air and the jackets on chilly nights, the changing leaves, the respite after months of ridiculous heat and humidity....  Ahhhh......  Love it.

I have a very sweet friend, Lindsey, who just started her own company making some delectable creations called cake balls.  Remember how I don't like the word balls associated with my food?  When balls is preceded by the word cake, I'm totally on board.  Besides, check out these things she makes!  They're gorgeous!  If you live in St. Louis metro area and you need a unique treat for a wedding or shower, please give Lindsey a call.  But I digress.  I remember from way back when in maybe 5th grade or so, I was complaining about how hot it was in the summer to Lindsey's mom, Bev.  Bev was a teacher, and full of worldly wisdom.  I remember she said to me, "We live in the Midwest because we love all four seasons."  True.  Of course Bev didn't mention that sometimes we get all four seasons in one day, but her point remains valid.  Every season brings its own special treats, especially in the kitchen.  Autumn is an awesome time to cook.  Pot roast with root veggies, roasted sweet taters and carrots, maybe some baked acorn squash with a little butter and brown sugar, or my favorite, apples.  I love to cook with apples.  So even though fall isn't quite here yet, I wanted to get a jump on apple cooking with this tasty creation.


I discovered a recipe for something called Apple Roll in an old cookbook called The Victory Handbook for Health and Home Defense loaned to me by my father-in-law.  This little cookbook is a World War II era gem which I am sure I will mention again in the future.  It's the only cookbook I've ever seen that explains how to properly display the American flag.  It also contains a list of ways to help conserve sugar for the war effort, such as to "educate your family in the spoon-stirring club," as undissolved sugar at the bottom of your cup of tea or coffee is wasteful.  Can you imagine our entire country being so united now that we would cooperate with having our coffee or our sugar or our gasoline rationed?  It's almost impossible to fathom my generation making a cake with honey instead of sugar, or saving a tiny bit of grease from a package of bacon so that it could be used to make explosives.  It almost seems romantic.  But maybe I say that because I happen to be married to one of the 1% of the population that has actually been asked to sacrifice anything as a result of a decade's worth of war.   But again, I digress....


Once I saw the Apple Roll recipe listed in the Victory Handbook, I noticed that it popped up in a couple other places.  One book called it Apple Roly Poly.  All the books where I found it were of the 1940s and 50s vintage, and they all called for a dough made from biscuit mix.  The dough was rolled out into a rectangle, then apples, sugar and cinnamon were sprinkled all over and the entire thing was rolled up and sliced into pinwheels.  I loved the idea, I just didn't like the biscuit mix thing.  I decided to roll mine up in a flakier, pastry type dough.  More like what you might use for a turnover.  I also decided to cook the apples a bit first to drive off a bit of their moisture.  But to make sure they didn't just turn to mush, I used Granny Smiths, which hold up really well to cooking and have a pleasant tart flavor.  After all that, my filling was still a little too juicy, but I didn't want to get rid of all that yummy, sugary, cinnamony flavor.  So I separated the apples from the cinnamony goo and put that in the bottom of the baking pan, and then placed my little apple pinwheels into it to bake.  After letting them cool for a few minutes, I decided to guild the lily a bit by drizzling them with a bit of icing.  The result was a bit like a cinnamon roll with apples in it, and that is exactly as awesome as it sounds.  Enjoy!


Apple Roll

You'll need to give the dough at least an hour to chill after you prepare it, or you could start well in advance (or even a day ahead) if you like.  I actually made my dough and filling in the morning, stuck them in the fridge during the day while I ran my errands, and then assembled and baked it in the evening.  An apple corer / slicer is a good gadget to have for a dessert like this, and if you're in the market for one, I suggest this version.  It's a great little tool because it can do 8 or 16 slices and it's super sharp.

Dough

2 cups flour
3/4 tsp. salt
1 cup butter, divided use
1/2 cup ice water, +/- a Tbs. or 2 more

Filling

3 cups diced Granny Smith apples, about 2 to 3 apples, depending on size
4 Tbs. butter
1/2 cup brown sugar, packed
1 tsp. cinnamon
1/4 tsp. allspice

Icing

3/4 cup powdered sugar
1 Tbs. milk

Cube 1/2 cup (1 stick) of the butter and place the cubes onto a plate.  Freeze for 15 minutes.  Combine flour and salt in a food processor and process until well combined. Scatter the cold butter cubes over the flour in the food processor and pulse until the mixture becomes crumbly.  Pour the flour and butter mixture into a bowl.  Add the ice water, starting with 1/2 cup and stir to combine until the dough comes together.  If it seems very dry, add a bit more water a little at a time until it just comes together.

Flour your counter top, rolling pin and hands and roll the dough into a 10" x 18" rectangle.  The first time you roll it out it will probably be pretty oddly shaped; just get it as close as you can.  It will form a better rectangle each time you roll it out.  Take 1/4 cup of the remaining butter (half a stick) and place little slices of it all over the dough.  Fold one third of the dough over onto itself, then fold the other third on top of that.  (See my picture below to see how I positioned the little slices of butter, and to see the first third of the dough folded over.)  Turn the dough 90 degrees and roll out again into a 10" x 18" rectangle.  Repeat the process with the remaining 1/4 cup of butter, then fold into thirds and roll out again into another rectangle.  (It ought to look pretty rectangular by now.)  Fold up again by thirds, then fold in half.  Wrap your little square of dough in some plastic wrap and chill for at least 1 hour.

For the filling, heat the 4 Tbs. of butter in a 12-inch skillet.  Once the butter is hot and has stopped foaming, add the apples and saute for several minutes until softened.  Add the brown sugar, cinnamon and allspice and cook over medium heat, stirring occasionally, until sauce has thickened a bit.  Remove from the heat and strain the sauce into a small bowl.  Set the apples and sauce aside until the dough has finished chilling.

When ready to assemble, preheat the oven to 425 and place an oven rack in the middle position.  Remove the dough from the refrigerator and let it set at room temperature for 10 or 15 minutes.  Spray a 9" x 13" baking dish with cooking spray and then spread the brown sugar / butter sauce evenly over the bottom of the pan.  Mix the icing ingredients together and set aside.

Roll the dough out into a 10" x 18" rectangle one last time.  Lay the dough on the counter top so that the short side is parallel to the edge of the counter and the long sides are perpendicular to it.  Sprinkle the apples evenly over the entire surface, leaving a few inches bare at the very top of the rectangle (the short edge furthest away from you).  Roll the dough up tightly and pinch the end to seal it as best you can.  Use a very sharp knife to slice the roll into 12 equal pieces and place each roll into the baking dish.  Bake for 20 to 25 minutes or until dough appears to be flaking into layers.  Cool in the pan for 10 minutes, then remove to a serving platter, flipping each pinwheel over so that the saucy part is on top.  Let cool an additional 30 minutes, drizzle with icing and serve.

Wednesday, September 7, 2011

Strawberry-Wine Jam

Hello, my name is Laura, and I'm a BBC addict.  Lately I've been watching Lark Rise to Candleford, which is an adaptation of the autobiography of a woman who apprenticed at the village post office at the turn of the last century.  Industrialism is just starting to creep into the country, but there's still plenty of old timey charm to keep people like me coming back.

What prompted me to develop this recipe was an episode where the postmistress makes wine jelly.  Sounds tasty, right?  I was completely on board.  Until she started boiling the pigs feet.  Thank god for modern conveniences, because I am not going to spend an afternoon boiling pigs feet to make jelly with.  Or anything with, really (yes I know pigs feet can be tasty but that is for someone else to boil in their kitchen and secretly feed to me without telling me what it is).

Also, the postmistress's jelly was more of a jell-o mold type thing rather than a spread, but the bug of wine jelly was already planted in my head.  Also, I'm more of a jam girl.  And so this recipe was born, with strawberries, and without pigs feet.

One great thing about this jam: 3 ingredients (house plants optional).  There are two things you should know about me, other than my love of costume dramas.  One, I am extremely cheap.  And two, I am extremely lazy.  Thus, box wine and frozen fruit, 'cause that's how I roll.  Use a wine that's not too sweet, or you'll want to cut the sugar by a bit.

Those super classy frozen strawberries are one pound bags.  Toss one bag in your non-reactive pot with the wine and sugar, and wait for your kitchen to smell like awesome.  After the berries have simmered for a few minutes, skim them out with a slotted spoon and reduce the liquid by half.


Lather, rinse, repeat with the other two pounds of berries.  Now here's where you have some options.  I like a looser jam so at this point I quartered a granny smith apple and let it simmer away for the final reduction.  Apples have a lot of natural pectin in them, especially the cores and seeds.  If you prefer a firmer jam, you'll probably want to go with pectin.  This step also depends quite a bit on your patience.  I didn't have it in me to wait for the syrup to reduce to the 1 1/2 cups it should have to really come together, so my jam is pretty loose.  If you can handle fussing over a pot for long enough to get a nice thick reduction, you don't even need extra pectin.  An important note: DO NOT WALK AWAY FROM SIMMERING WINE AND SUGAR.  Check in on it every 5 or 10 minutes, or it will turn into a burnt sticky mess.  Not that I know from experience or anything. 

Hey, remember that giant pasta pot you got that seemed like a great idea at the time but you hardly ever use because it's huuuuuge and takes 40 minutes to boil a pot of water and is a pain in the ass to clean?  Drag that baby out, it's time to can!  As previously mentioned, it'll probably take a while to get a good boil going, so you'll probably want to start this up during your last reduction.  Boil your jars and rings for ten minutes, and add the lids maybe five minutes before you start to fill the jars.

Once you've exhausted whatever patience you have and reduced your liquid, it's time for pectin if you're using it.  Bring your liquid up to a full boil for at least a minute, stirring the whole time (or follow the instruction on the box, they're all a little different).  Now, dump your strawberries back in the pot, and simmer for 10 minutes or so.  You can either leave them whole or break them down a bit.  A potato masher works nicely for this.  Full disclosure: I did not test this recipe with pectin so I can't guarantee results, or that I'm even giving you decent instructions on using it for this kind of jam.

At this point, if you used a granny smith apple, fish it out and toss it.  Remove one jar at a time from your boiling water and fill it with jam, leaving 1/2" of head space.  Wipe away any jam that gets on the mouth of the jar, put the lid on and tighten the ring about halfway.

Return your jars to the boiling water, making sure to have at least 1" of water covering them.

And now you're pretty much done!  The advantage to the pasta pot is that you can just lift the perforated inset out and not have to screw around with lifting slippery jars out of boiling water.  If you don't have this kind of pot or a canning basket, I suggest investing in a pair of canning tongs because it is annoyingly difficult to remove full jars from the pot with normal kitchen tongs.  Extra jar rings can be used to elevate the jars from the bottom of the pot, but again I strongly recommend canning tongs if you're going to do that because otherwise you'll probably end up curled in a ball on your kitchen floor cursing yourself for wanting to save $4 because fancy equipment is for sissies.  Or something.

Gently test the seal on the lid by removing the ring and pulling up on the lid a bit.  If it comes off, wipe your jar mouth and reprocess.  Let your jars cool and test the seal again the next day.  If all is well, tighten down the rings.  If you find that your jam isn't firm enough for your liking, you can add pectin (or pigs feet) and try again.

With less sugar, this also makes an excellent cake topping or filling.  Cut the sugar by about 1/2 a cup if you're planning on putting it on something that's already sweet.


Strawberry-Wine Jam

3 pounds hulled strawberries, fresh or frozen
1 1/8 cup sugar
1 cup wine
Optional: 1 granny smith apple, quartered, OR 1 package powdered pectin

Combine 1 pound strawberries with the sugar and wine in a non-reactive pot.  Bring to a simmer for a few minutes, then remove the strawberries to a bowl.  Reduce the liquid by half, then add another pound of strawberries and repeat until all the berries are cooked.

If using a granny smith apple, add to pot and simmer until liquid is reduced to 1 1/2 cups.  If using pectin, add after the liquid is reduced and bring to a boil for at least a minute, or as the instructions indicate.  Add the strawberries (whole or mashed) and their liquid back to the pot and simmer for at least 10 more minutes.

Put jam in boiled jars, wiping the mouth of the jars before adding the lid.  Process in boiling water for 10 minutes.  Check the seal after processing and again one day later.

Makes 4 half-pint jars, with a bit left over, depending on how far you reduced your liquid.

Monday, September 5, 2011

Peach Pandowdy


In my mom and dad's house there is a rule about cooking in the summer - the oven stays OFF.  Weekly menus aren't planned until the weather forecast has been consulted, and if it's going to be hot enough to run the air conditioner, dinner better come off of the stove top.  Or be a BLT sandwich.  You don't want to heat up the house, right?  If Thanksgiving happened in the summer, the turkey at my parents' house would have to come out of either a slow cooker or an electric roaster.  And pumpkin pie?  You might as well just eat the filling out of the can because you ain't makin' a pie in my momma's oven.  Not when it's 100 degrees out and a thousand percent humidity.  (I know a thousand percent makes no mathematical sense, but you spend a summer in St. Louis and tell me it's not possible.)

So if you are anything like my parents, I would like to submit peach pandowdy as a really good reason to crank your oven up to 500 degrees in the dog days of summer.  Yes, it's still summer, even if Labor Day weekend is the "unofficial" end to summer.  I prefer to let the autumnal equinox tell me when fall has arrived, not a three day weekend.  So go to your farmer's market or grocery store and get yourself some late summer peaches, let them sit on your window sill for a couple of days and make this dessert.  You will not be sorry, even if you sweat while it's baking.


This recipe represents one of my prouder culinary moments because I researched about 50 old recipes - for apple pandowdies and betties, peach pie, peach dumplings, peach cobbler, peach custard pie, peach shortcakes, peach crisp and peach cake - took my favorite ideas from a bunch of them, and turned out this beauty.  On the first try.  I was snapping pictures of my portion as my husband was digging into his.  He didn't say anything for a while, so I said, "Well, how is it?"  With his mouth full, he mumbled, "Do I have to stop eating to answer?"  I took that as a good sign.


A pandowdy is like a pie but with only a top crust.  The crust gets poked down a bit (this is the dowdying part) so that the juices bubble up from the bottom and kind of spill over the crust. Every old recipe I looked up was for apple pandowdy, but as I said, I was still in summer mode, so I went with peach.  I did find one old cookbook that included a bottom crust.  I immediately decided to steer clear of the bottom crust idea for several reasons, the most convincing of which was that I wanted a really juicy filling, and that would have just made a soggy, gross bottom crust.  A lot of the old recipes used some sort of baking dish or casserole dish, but I opted for a skillet.  Apple pandowdies tend to be baked a long time to give the apples a chance to soften and break down a bit, but I wanted to preserve as much of that luscious fresh peach flavor as possible so I kept the cooking time just long enough to bake the crust.  A very hot oven makes the crust brown up beautifully and gets it out of the heat quickly.  We finished ours with a scoop of vanilla ice cream, but a dollop of fresh whipped cream would be wonderful, too.


Peach Pandowdy

You really need to use a traditional skillet here, not a nonstick.  The oven needs to be so hot that it's not safe to use nonstick.  If you don't have a 12-inch traditional skillet, transfer the peach filling to a baking dish after you've heated and thickened the saucy part, and just roll your pie dough out in a rectangle to fit to fit your dish instead of rolling it out into a circle.  I have no good advice on how you would adapt this recipe to use frozen peaches because the peach peels added such a huge amount of flavor to the sauce.  I think fresh is really the way to go for this recipe.  Don't roll out the pie crust until the very last minute, when the oven is preheated and the filling is totally ready to go.  With an oven that hot, your kitchen will be too warm for pie dough to survive outside of the refrigerator for very long.

Crust

1 1/4 cups flour
1 1/2 Tbs. sugar
1/4 tsp. salt
4 Tbs. butter, cubed
4 Tbs. shortening, cubed
4 to 6 Tbs. ice water

Filling

6 cups peaches, peeled and sliced about 1/4" thick, about 6 to 7 peaches
Peelings from peaches
2 cups water
2 tsp. cornstarch
1/3 to 1/2 cup sugar

1 egg, beaten
2 tsp. sugar
1/4 to 1/2 tsp. cinnamon

Place the cubes of butter and shortening on a plate and freeze for 15 minutes.  Meanwhile, pulse the flour, salt and 1 1/2 Tbs. sugar in a food processor until well combined.  Sprinkle the very cold shortening cubes over the flour mixture in the food processor and pulse until the mixture appears crumbly.  Add the butter cubes and pulse again until mixture once again looks crumbly.  Place the flour mixture into a bowl.  Sprinkle ice water into the mixture and, using a rubber spatula, stir the water into the flour until it forms a ball.  Start with 4 Tbs. of water and only add more if the mixture is still very dry and crumbly.  Turn the ball of dough out onto a sheet of plastic wrap, form the dough into a disk and wrap up tightly in the plastic wrap.  Place the dough in the refrigerator until ready to use.  (You can do this part well ahead of time if you like.)

Place the peach peels and water in a medium sized saucepan and bring to a simmer.  Cover and simmer for 20 minutes.  Meanwhile, whisk together the cornstarch and sugar until no cornstarch lumps remain.  You will need to decide how much sugar based on how sweet your peaches are.  Mine were quite sweet, so I went with 1/3 cup.  If yours are a bit tart, go for 1/2 cup.

Move an oven rack to the top middle position and preheat the oven to 500 degrees.  Strain the peach peel / water mixture from the saucepan into a 12-inch skillet.  Discard the peels.  Put the skillet over medium-high heat and whisk the sugar and cornstarch mixture into the peach juice until the sugar dissolves.  Bring the peach juice to a boil and continue whisking until the mixture thickens.  Remove the skillet from the heat and add the sliced peaches, stirring until all the peaches are well coated with the sauce.

Mix the final 2 tsp. of sugar and the cinnamon together in a small bowl and set aside.  Flour your counter top, rolling pin and hands well and place the disk of pie dough on the counter.  Roll out into approximately an 11-inch circle.  Place the pie dough over the filling in the skillet.  It does not have to be pretty.  In fact, I like that mine looked kind of rustic.  Brush the top with the beaten egg and then sprinkle with the cinnamon sugar.  Take a knife and cut through the dough.  I made three cuts in one direction, then turned the skillet 90 degrees and made another two cuts.

Place the skillet on the rack in the top middle position and bake for 20 minutes, or until the crust is very well browned.  Cool for 15 to 20 minutes and serve warm with vanilla ice cream or whipped cream.

This is still great left over.  Just nuke it for about 30 to 45 seconds on high in your microwave.  YUM.


Sunday, September 4, 2011

Cocktail Night! - Whiskey Sour and Long Island Sweet Tea


It's the weekend again!  So what atrocity are Marc and Sallie having for dinner tonight?  How about homemade potato chips?  Hey, we had to try out our new v-blade slicer, and potato chips were the first thing that came to mind.


Labor Day weekend is our anniversary weekend, so there were bound to be indulgences.  Well, actually it's one of our two anniversaries.  Like many military couples, we got married at the courthouse just so we could show Uncle Sam we were legit, and then had an actual family wedding with the cake and the dress and all that a few months later.  Having two anniversaries is great because you have two built-in excuses for going out to dinner, or getting an extra special bottle of wine, or whatever way you feel like celebrating.  It's a pretty cool club to be in.  Plus, we always like to kid about how our courthouse marriage was in one of the few states left in the country to allow first cousins to marry.  (Guess which one!)  Not that Marc and I needed to worry about that, but it makes for good redneck jokes.  Since Marc is from Arkansas, that comes pretty naturally to him.


Friday, our usual cocktail night, became anniversary date night.  We went into Kansas City and had steak au poivre and lamb with chimichurri sauce for $40 a plate, because that's what you do when you've been married for 4 years.  And you didn't realize how expensive the menu was.  Not that I'm really complaining.  The place was awesome, and so was the food.  We had a great time.  And when we came home the dog was so excited that she ran around in circles at the speed of sound inside the living room.  Can't beat that with a stick!


But this also means that by Saturday night, we were both ready to put some effort into a few great cocktails.  When I tried to think of an old timey drink that needed some sprucing up, a whiskey sour popped into my head almost immediately.  Why?  Drink mixes.  You know the kind, the pre-made junk that is the color of nuclear waste in the movies?  Crap in a bottle.  If you love the taste of yellow dye #5, keep on buying the mix.  If you want something that actually has a lemon in it, you can make your own.  It's not hard, and it's infinitely tastier than the pre-packaged.

Old recipes for sours - whiskey, amaretto, or what have you - contain an egg white to make a frothy kind of layer at the top of the glass.  This looks really cool, but seems a bit fussy for the home bartender.  That combined with the fact that Marc once got really sick on raw eggs made me toss that idea out completely.  A traditional sour is also probably going to just have lemon juice and then a simple syrup or gomme syrup.  I always put limes in my sweet and sour mix because for one, I love limes.  Two, I think it just adds another note of tangy-ness and interest to the taste.  So in the end, this isn't terribly "traditional," but that's not really why I started this discussion anyway.


Sweet & Sour Mix

If I'm going to make this, I usually make quite a bit.  Then I just keep it in the fridge and have fun making things out of it here and there.  You can certainly cut the recipe down.

1 1/2 cups water
1 1/2 cups sugar
1 cup fresh squeezed lemon juice, about 6 to 8 lemons
1 cup fresh squeezed lime juice, about 10 to 12 limes

Pour the water and sugar into a medium sized saucepan and bring to a simmer.  Once all of the sugar is dissolved, remove from the heat and let cool.  Add the juices and stir until well combined.  Refrigerate until ready to use.

So now let's use it!

Whiskey Sour

Use a cocktail glass, which is the one a lot of people think of as a martini glass. The one you see in the pictures is kind of stemless, but you get the idea.  This makes enough for two servings.

6 oz. whiskey
4 oz. sweet & sour mix

Pour the whiskey and sour mix into a shaker filled with ice.  Shake well and strain into two cocktail glasses.  Garnish with a maraschino cherry and orange slice, if desired.


Enjoy your whiskey sour, but don't put that sweet and sour mix away yet!  How about a Long Island Iced Tea?


Probably because there are so many components in this drink, there are a million versions out there.  As far as I know, the original contains white rum, vodka, gin, tequila, Cointreau, lime juice and cola.  Or it might be triple sec as opposed to Cointreau.  But anywho......since I already had the sweet and sour mix made up, I swapped it for the lime juice, and since that made it a bit sweeter than normal, we called it a Long Island Sweet Tea.  We also used dark rum because we just really love dark rum, and Grand Marnier instead of the Cointreau since that's what we had on hand.  You could probably stand to go a little less "top shelf" than we did and still have a great drink.  We tend not to keep much that is cheap in our collection so we used some fairly premium stuff.  After his first sip, Marc said, "this is the best Long Island Iced Tea I've ever had."  So there you have it.


Long Island Sweet Tea

Use a highball glass, which is around 10 ounces.  This makes enough for two servings.

1 oz. vodka
1 oz. dark rum (not spiced)
1 oz. gin
1 oz. silver tequila
1 oz. Grand Marnier
2 oz. sweet & sour mix
cola

Fill two highball glasses with ice.  Pour all ingredients except the cola into a shaker filled with ice.  Shake well and strain into the two glasses.  Top up with cola and garnish with a slice of lime.