Monday, December 12, 2011

Peanut Brittle


Has it really been 3 weeks since my last post?  Wow.  Traveling out of town for Thanksgiving + being in charge of about half of the big meal + the school semester coming to a close = Insanity.  At least Thanksgiving was an enjoyable kind of insanity.  My niece, Celeste, took an instant liking to my brother Drew, and we all enjoyed hearing her call him "that guy" and "mister."  "Mommy, can I sit next to that guy at dinner?" she would ask.  Priceless.

So now it would seem the insanity of the Christmas season is upon us and, while crazy, this is my favorite time of year.  I'm a sucker for tradition, and developing new traditions as I get older.  When I was young, I remember wrapping presents one year while The Grinch was on tv (the good old animated version), so then the next year I played and replayed and replayed our video tape of it while I was wrapping.  Like, literally for hours.  It became my thing.  I could barely stand to wrap gifts without having The Grinch on in the background.  I still play it when I wrap, but at least now that I'm older I don't replay it over and over again.

One of my more recent holiday traditions is candy making.  I think this is my 5th year of doing it and every year I add to my repertoire.  It started as an attempt to do something other than Christmas cookies with a version or 2 of fudge and probably some buttercrunch, and has become a ridiculous, all-out affair that sucks up at least one entire weekend of December every year.  Of all the things I do in the kitchen all year long, candy making may just be my favorite.  I get so excited about it that pretty much by Thanksgiving, I already know which weekend is going to get sucked into the candy black hole and have a list of all the things I'm going to make.  After I hit the grocery store to buy all my supplies, I unload them right onto the counter and leave them there like a trophy, so I can watch the raw materials turn into something wonderful.  When I'm finished, I divide everything up so that Marc and I can each take a little of everything to work and I also give some to friends and family.  One year when I was still living in St. Louis, I took so much candy to work that the 40 some-odd people in my department plus the random passers-by from other departments could not finish everything I brought in even after a full day of grazing.  I was almost embarrassed by the amount of stuff, but in the end it kind of made me an office legend.  My boss even gave me a $50 gift card on behalf of the company to offset the cost of the ingredients.  HA!

I get a thrill out of candy making for 2 reasons: (1) usually the results taste awesome and (2) it is such a challenge.  Cookies taste great, and there is certainly some skill involved if you want to make really good ones, but candy is an art and a science where you live and die by the thermometer and your level of preparation.  The magical transformations that sugar undergoes at certain temperatures can be wielded in such a way that exactly the same ingredients can turn out totally different just depending on how hot you cook it.  How cool is that?

I have some regular items that I make every year.  I always make pralines for my mom, some chocolate covered coconut almond candies that kind of taste like an Almond Joy for my husband, and a 4 layered fudge that tastes like a Snickers bar for myself.  Another one of my usuals is peanut brittle.  I have faithfully made it every year that I've made candy, and over the years I've gotten better and better at it.


I want to just take a minute to be a lame-o and encourage you to practice good kitchen safety when making candy.  Boiling sugar is much, MUCH hotter than boiling water, and if you burn yourself on it, it will stick to your skin which means it's also in contact with your skin longer than boiling water would be.  Please do not make this recipe if there are little ones or furry kids under foot.  Get them out of the kitchen first.  Also, it's imperative to be prepared.  Prepare your pan and all your ingredients first.  Make sure you have a trivet or a potholder where you can set your hot pot, and a spoon rest where you can put your boiling hot candy covered spoon or scraper, should the need arise.  Know where your oven mitts are.  And for God's sake, wear shoes or at least socks.  One time I dropped a little drop of boiling sugar and it landed on my bare foot - you don't forget a thing like that, even if it is a tiny drop.


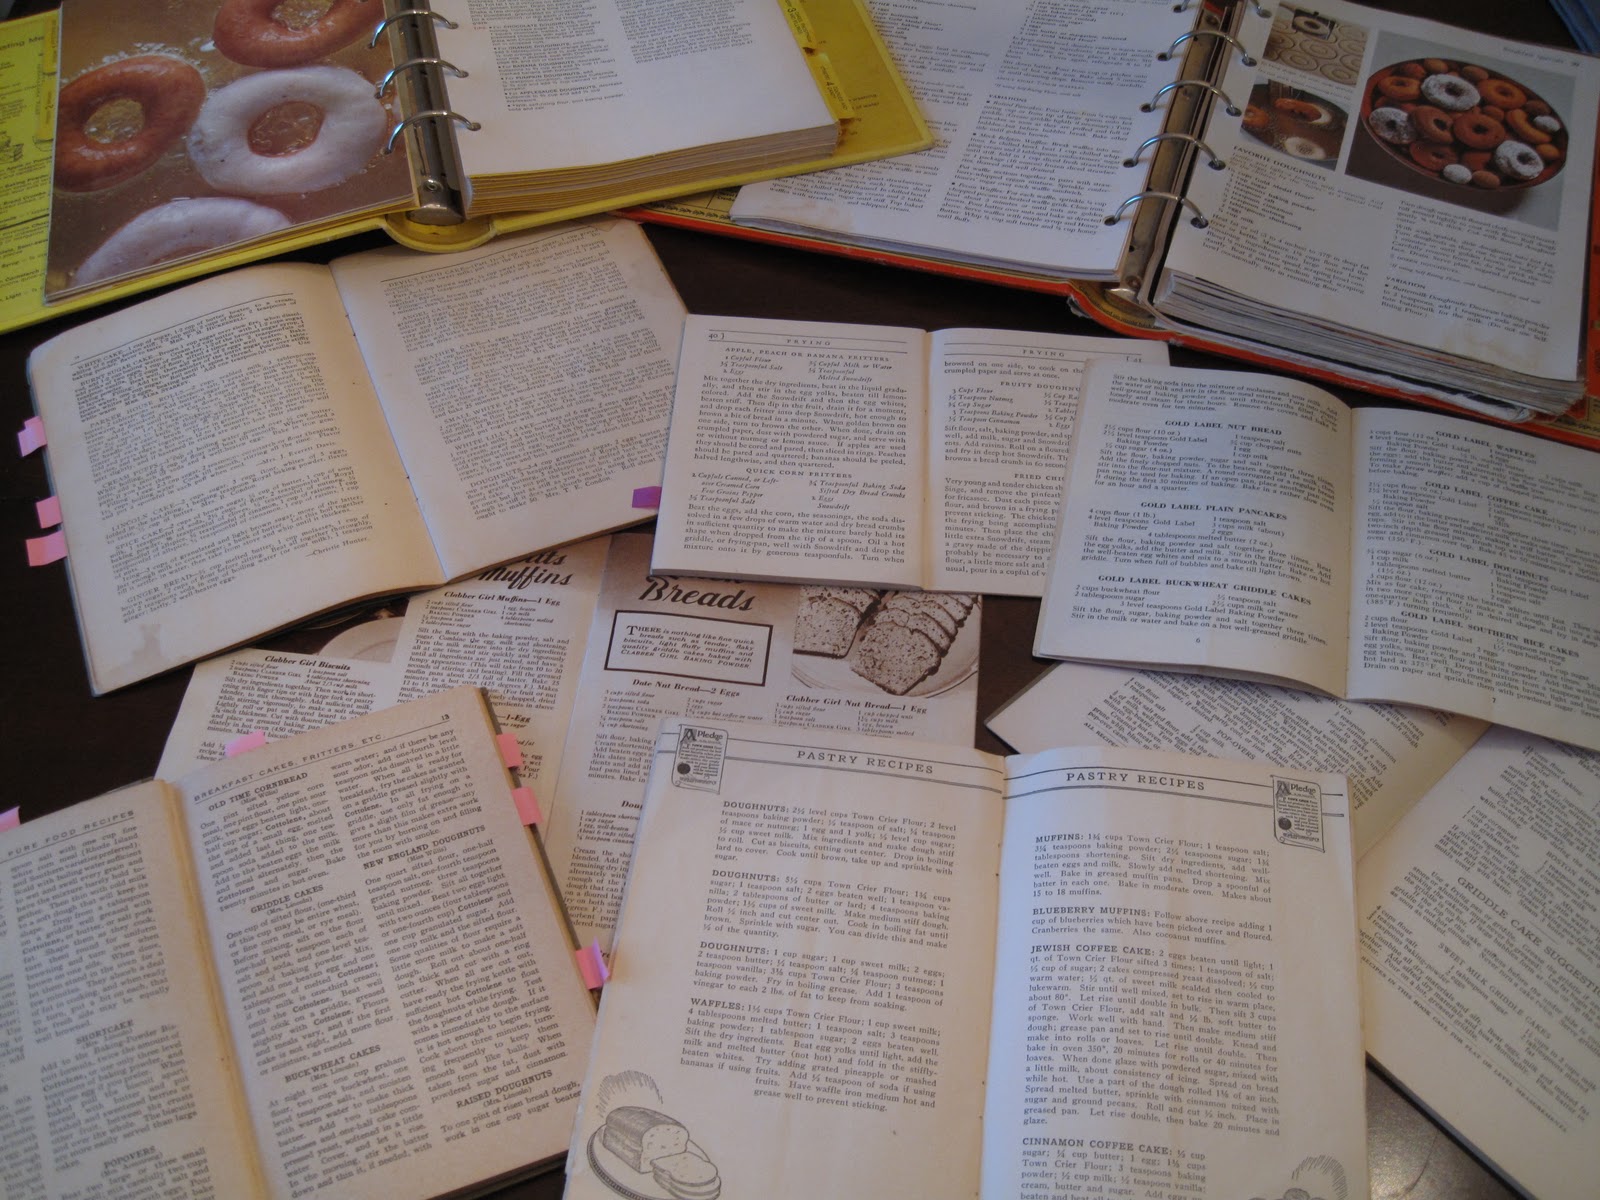
Also, if you're cooking on an electric stove like I am, first of all, my condolences.  Do you dream about this at night, too?  No?  Ok, maybe I need to get some help.  At any rate, if anything makes candy making even more of a challenge, it's an electric stove because it is so hard to control the heat.  Always make sure you have an unused burner or a cool place to set the pot so that when you hit the right temperature, you can immediately remove it from the heat.  Speaking of temperatures, unless you are well versed in the whole put-a-drop-of-candy-in-some-water-and-see-if-it-makes-a-hard-thread thing, you MUST have a thermometer to make candy.  My old faithful one recently crapped out and I replaced it with this one, which I really like had potential to be great but then broke after the first time I used it.  I didn't figure out that it wasn't working properly until I had already ruined a batch of brittle.  Screw.  That.

Now I'm off to put the last layer on my Snickers fudge.  And in Whoville they say that Sallie's stomach grew 3 sizes that day!
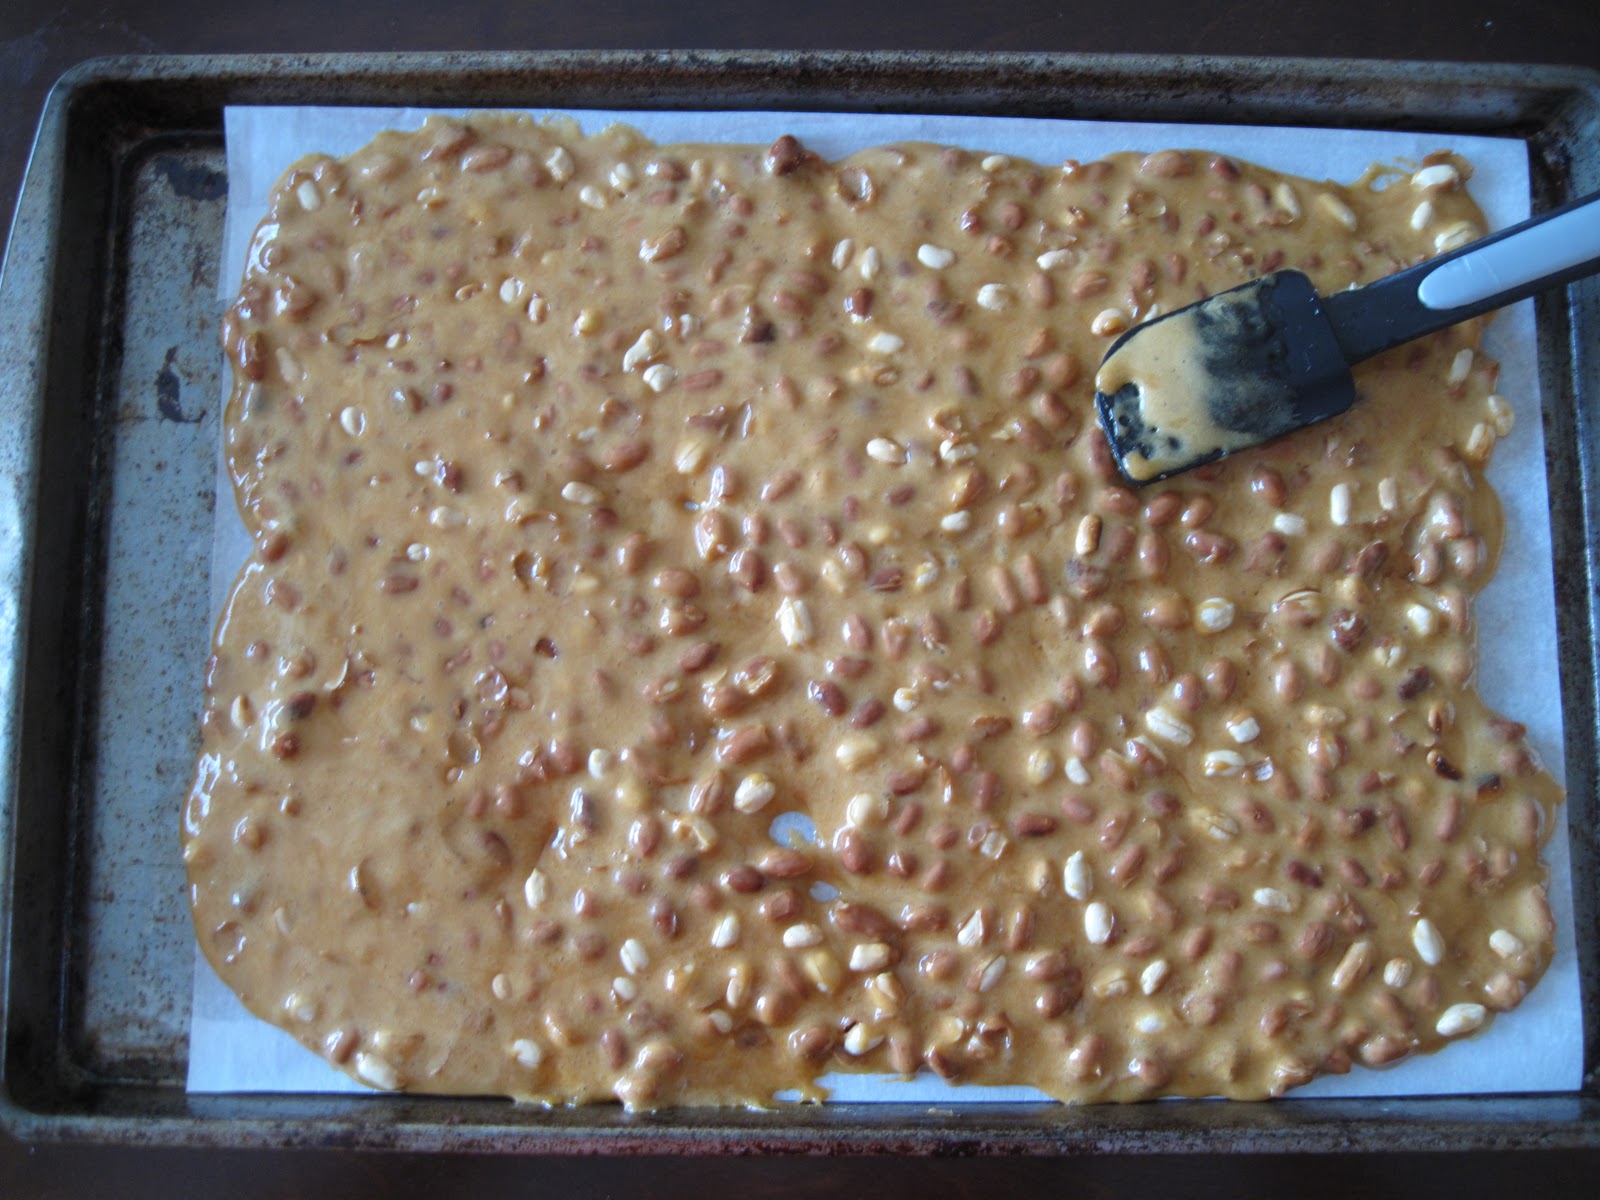
Peanut Brittle

Warming the sheet pan in the oven first is optional, but I think it provides a couple extra seconds to get the candy in an even layer before it hardens.

1/4 cup water
1/2 cup corn syrup
1 cup sugar
dash of salt
1 1/2 cups Spanish peanuts
2 Tbs. butter, cut into about 6 to 8 cubes
1 tsp. vanilla
1 tsp. baking soda

Preheat the oven to about 200 and put in a sheet pan covered with parchment paper to warm up.  Measure out all ingredients first before cooking and have them sitting near the stove.  In a heavy saucepan over medium heat, bring water, corn syrup, salt and sugar to a boil, making sure all sugar dissolves.  When the mixture reaches 240 degrees, add the peanuts.  Continue to cook, stirring constantly until mixture reaches 300 degrees.  When the mixture is getting close to the right temperature, pull the warm pan out of the oven.  When the temperature reaches 310,  pull the saucepan off the heat and quickly add butter, vanilla and baking soda and stir to combine.  Immediately pour the mixture onto the warm pan and spread out.  Cool and break into pieces.


Sunday, November 13, 2011

Cinnamon Sugar Cake Doughnuts


I started seeing an acupuncturist recently, which is a really interesting experience.  I don't know why it is that having needles shoved into your ears and forehead is relaxing, but trust me, it is.  Anyway, one of the first things she told me was to think about going gluten-free and dairy-free.  So what did I do?  I went home and thought about it while I made doughnuts.  After taking my first bite, I decided I had thought about it enough.  Honestly, I'm pretty sure I wouldn't even know how to eat gluten-free, but I know for sure it means no doughnuts.  To which I say, no deal.

Our ancestors LOVED them some doughnuts.  Like, really loved them.  At least, I assume they did because almost every single old book in my collection has a minimum of one doughnut recipe.  Most have more than one including at least one cake doughnut recipe and one yeast.  (By the way, if you're wondering why I'm spelling it doughnuts as opposed to donuts, it's because all my old recipes spelled it that way, so it's my homage to those early 20th century cooks.  Ah, the good old days before laziness had even invaded the way we spell things.)  As visual proof of the plethora of doughnut recipes, here's a picture of all my books open to the doughnut page, and this doesn't even include the recipes on my computer from the books that I scanned before I returned them to their rightful owners.


This picture also gives you an idea of where I start with each recipe I work on.  (Recipes from my Grandma are the exception because I just take her original and go from there.)  But generally I get all my old books out and find as many versions as I can of what I want to work on and start cherry picking my favorite ideas from each one, and that was what I did here.  It's especially helpful with these old recipes to have lots to work with because so many of them are so vaguely worded that it really helps to be able to compare them against each other when one calls for "an amount of butter the size of an egg," or to "mix in enough flour to make a stiff dough."  I'm a scientist!  Give me measurements, dammit!  I'm still trying to figure out what it means when they say, "mix all ingredients as for a good cake."  I see that more often than you'd realize.  What do they mean?  Did they ever mix up bad cakes?


There's certainly no bad cake here.  Up to this point, the only doughnuts I had ever made on my own were baked in a doughnut pan with a Stonewall Kitchen mix.  While they are very good, I don't exactly consider them homemade.  They are homemade in the same way that Hamburger Helper is "making dinner."  (Marc can tell you that I laugh sarcastically every time we see that commercial and the people act like they are heroes for throwing some ground beef in a pan with a packet of powdered cheese.)  Stonewall Kitchen's tasty mix notwithstanding, I've now come to the realization that it's really hard to beat a light, cakey doughnut hot out of the oil with a little bit of a crusty exterior.  And given that they are so easy to throw together, why not make your own?

Homer Simpson once asked, "Doughnuts: is there anything they can't do?"  They sure can't make me want to give up gluten.


Cinnamon Sugar Cake Doughnuts

This recipe as written makes about 6 or 8 doughnuts.  I was afraid to make any more than that because I knew Marc and I would have eaten all of them, no matter how many there were.  It should be very easy to double if you want to make a full dozen.  Also, the dough keeps very well in the fridge.  Marc and I made 3 to split for breakfast one morning, then fried up the remaining dough the next day.  There was no difference in the ones that were made from fresh dough and the ones that were made after the dough had been refrigerated.


1 1/2 cups flour, plus a little extra as needed
1/4 tsp. ground nutmeg
1/2 tsp. cinnamon
1 tsp. baking powder
1 tsp. baking soda
1/4 tsp. salt
1 egg
1/2 cup sugar
1 Tbs. melted butter, cooled
1/4 cup buttermilk

Topping

1/2 cup sugar
1 tsp. cinnamon

Whisk together flour, salt, baking soda, baking powder, cinnamon and nutmeg.  Set aside.  Mix the topping ingredients together in a wide, shallow bowl and set aside.  Begin heating about an inch of oil in a Dutch oven.  Put it on a low heat while you mix up the dough.

In a medium sized bowl, beat the egg.  Whisk in the sugar, melted butter and buttermilk in with the egg.  Stir in the flour mixture.  If the dough is very sticky, add more flour, 1 Tbs. at a time, and stir into the batter until it is not too sticky to roll out.  This amount will depend on how much moisture is in your flour and your kitchen in general.  It ended up being 2 Tbs. in my case.

Lightly flour a work surface and pat the dough out into a circle about 1/4" thick.  Remember to occasionally check to make sure it's not sticking to the work surface; add flour as necessary.  Use a doughnut cutter or a couple biscuit cutters to cut out doughnuts and holes.  I used a 3 1/2" biscuit cutter for my outer circle and about a 1 1/2" cutter for the hole.

Boost the heat up on the oil until it reaches 350 degrees.  Carefully pick up the cut out doughnuts with a spatula and slide into the oil.  Fry the doughnuts until golden brown on both sides, about 1 to 1 1/2 minutes per side.  Remove from the oil and drain on paper towels.  Immediately roll in the cinnamon sugar mixture. 

Friday, November 4, 2011

Pumpkin Bread


If you took all the old cookbooks I have in my collection and vowed to make a different quick bread recipe from them every day until you ran out of variations, you'd be making nut bread until the day you dropped dead.  Banana bread, date bread, nut bread, muffins of every flavor you can imagine, and possibly some flavors you can't imagine (I saw one version that contained salt pork), there is virtually no end to the way our ancestors threw together flour, baking powder, sugar, etc.  I'll probably get around to trying some of the nut breads some day, but in honor of fall, this time I decided to try my hand at pumpkin bread.  I found two pretty old recipes from my collection and one from my mom's Betty Crocker cookbook circa early 70s that I used as my inspiration.  That said, I didn't really use any of them even close to as-is.  I took my favorite ideas from all of them and pulled some ideas out of my own strange little brain and out came this beauty.  Not that I want to be responsible for encouraging you to eat any raw egg at all, but I'm not gonna lie, I licked the hell out of this bowl and the batter was divine.


 Just as a side note, one of these days I'm going to have to post some of the recipes I just don't feel like I can "save," because some of them are hysterical.  In the course of paging through some of the old books while researching the next recipe I'm hoping to do (also known as doughnuts) I was reading some things out loud to Marc as we were alternately laughing and trying not to vomit.  Let me just say, people in 1909 ate some nasty sounding crap.  Think cold fish layered with sliced hard cooked eggs and thick white sauce (whatever THAT is) and served over lettuce.  Or watercress, depending on your taste.

But put that yucky stuff out of your mind right now.  There's pumpkin bread waiting....


Pumpkin Bread

This recipe makes 2 loaves but you could probably cut in half without much trouble.  I suspect you could substitute greek yogurt for the sour cream, but I haven't tried that yet, so it's just a hunch.  I put 1/3 cup of chopped, toasted pecans in one of the 2 loaves.  Two of my three inspiration recipes contained raisins but that didn't interest me one bit.  But if you want them, about 1/3 cup per loaf ought to do it for that, too.  Personally, I like it best plain with no nuts or anything extra in there.

3 1/2 cups flour
1 tsp. salt
2 tsp. baking soda
1/2 tsp. baking powder
1 tsp. cinnamon
1 tsp. ground cloves
1/2 tsp. ground nutmeg
1/2 tsp. ground ginger
4 eggs
2/3 cup oil
2 cups sugar
1/2 cup maple syrup
3/4 cup sour cream
1 lb. canned pumpkin
nuts, 2/3 cup if you want nuts in both loaves, 1/3 cup for one loaf (optional)
raisins, 2/3 cup if you want raisins in both loaves, 1/3 cup for one loaf (optional)

Preheat oven to 350.  Whisk together the flour, salt, soda, baking powder, cinnamon, cloves, nutmeg and ginger in a medium sized bowl.  Set aside.

Whisk sugar, eggs, syrup and oil in a large bowl until well combined.  Add pumpkin and sour cream and stir together.  Stir in dry ingredients until just combined.  Spray two 9" x 5" loaf pans with vegetable oil.  Or you can do like I did and make a parchment paper sling and line the pans that way.  Evenly divide the batter between the two pans and smooth the top with and offset spatula.  Bake for about 50 to 60 minutes, rotating the pans halfway through.  Cool in the pans for 10 minutes.  Remove from pans and place on  a wire rack to cool completely.

Wednesday, October 26, 2011

Oatmeal Chocolate Chip Cookies


If the forecast for this weekend holds, I think Marc and I are going to have to go hiking.  We haven't really been since we were in Maine back in June (which, by the way, is solidly in first place on my list of favorite places to hike, or do anything, really).  So maybe that's partly the reason we haven't gone lately is that I figure the first post-Maine hike is going to be a let down.  Or maybe because our summer got seriously disrupted by having to move 1,260 miles across the country.  Or partly because I have been forced to be low key a lot since we moved here due to medical treatment.  Or because we live in Kansas now, and where do you go to "hike" in Kansas?  If you know the answer to that question, please drop me a line because I'm not trying to be snarky, I just genuinely don't know.  At any rate, I think it's long overdue, and surely we can find a good trail somewhere, even in the flat lands of the Midwest.

In the past, I have found out the hard way that adequate snackage is vital on a hike.  A few times I have not done a good job of preparing for a hike or a lengthy paddle in the kayak and hit the proverbial wall with quite a thud.  One time, paddling on the Hudson River up in New York, I got so tired halfway through that Marc had to tie a rope from his boat to mine and drag me back up the river, against the current.  He's quite a guy, isn't he?  Without him I guess I would have just floated all the way down to Manhattan and on out to sea.


About a month after the incident where Marc towed me back up the river like a derelict tugboat, we went to Maine for the first time, and since the menu of activities consisted mainly of hiking and kayaking, I got smart and made some snacks ahead of time.  Enter this oatmeal cookie.  I've never been a big fan of oatmeal cookies in general, I think because they usually have raisins in them, which are not my favorite.  But I discovered this recipe, another gem from Grandma Marguerite, that she wrote out by hand into the aforementioned cookbook that she gave me for Christmas one year.  I am sure she just clipped it out of a newspaper or a magazine and I have no idea how old it is.  In contains instant vanilla pudding mix, which isn't usually something I would bake with, but the thing that really caught my eye about it was that the traditional raisins had been swapped out for chocolate chips.  SCORE.  Figuring that the sugar would give us quick energy, the oats a little bit longer lasting energy, and the chocolate would just be awesome, I decided these would be perfect for our outdoor activities.  It's gotten to the point now where they are nearly as quintessential of a hiking companion as our dog, Maggie.


Overall, this is a pretty traditional cookie recipe, what with the creaming of the butter and the sugars, etc.  As I said, I would not usually bake with instant pudding mix, but every time I try a new recipe, I pretty much make it the way it's written the first time and I don't tweak it until the next time, if I feel like it's got potential.  In this case, I loved the cookie so much as is that I made very minimal changes.  So, yes, I even left the pudding mix in.  The only things I did differently were that I upped the amount of brown sugar and decreased the white sugar, since brown sugar is more moist and therefore gives a more chewy texture.  Another improvement to the texture was my choice of rolled oats as opposed to quick cooking oats, which also have a more oaty flavor, in my opinion.  I also nixed the second egg white in favor of just a yolk, again hoping for more chewiness.  My last change was to increase the size of the cookie.  The original called for using 2 teaspoons of dough, which seemed utterly laughable to me.  I went for a hardy 2 Tablespoons.  At this size, you'll get about 30 big, fat, chewy cookies.  You could also throw in about a cup of nuts, if you like.  I have occasionally put in pecans for a bit of protein.  Go bake a batch and then take a hike.


Oatmeal Chocolate Chip Cookies

I grew up in a house where you underbake cookies so that they stay soft as long as possible, so that's what I did here.  They will bake all the way through and be safe to eat, but they will be soft.  If you want them a little more done, have at it.

1 cup butter, softened (2 sticks)
1 cup brown sugar, packed
1/2 cup white sugar
1 egg
1 egg yolk
1 tsp. vanilla
3 cups oats
1 1/2 cups flour
1 pkg. (3.5 oz.) instant vanilla pudding mix
1 tsp. baking soda
1 tsp. salt
1 cup chocolate chips
1 cup chopped nuts (optional)

Preheat oven to 350 degrees.  In a medium bowl, stir together oats, flour, dry pudding mix, baking soda and salt until well combined.  Set aside.

In a large bowl, cream butter and sugars together with a mixer until fluffy.  Beat in egg, egg yolk and vanilla.  Stir in dry ingredients with a sturdy wooden spoon.  This is a really stiff dough and it will take some muscle to get it all combined.  Stir in chocolate chips and nuts, if using.

Cover a baking sheet with parchment paper.  Drop cookies onto the sheet using 2 Tablespoons of dough at a time and use your palm to flatten them out a little.  I only do 8 cookies at a time on a baking sheet because these are big cookies.  That said, they don't spread a whole lot so you could probably get away with a few more on a sheet if you want.  Eight is a safe number, though.

Bake one baking sheet at a time for 10 minutes.  Allow the cookies to sit on the pan for at least 5 minutes before removing and placing on a cooling rack.  Don't skip this step or they will be too soft to move and will fall apart.  Makes about 30 to 32 large cookies.

Sunday, October 23, 2011

Crumb Topped Cherry Pie


I lit my oven on fire last week.  It was pretty exciting.  I had made something that spilled over and then forgot to clean it up.  So last Friday when I was rushing to get everything done for Marc's big birthday dinner, I turned the oven up to 425 to pre-bake a pie crust for his pecan pie, not even thinking about how the much hotter temperature was definitely going to burn up that goop that was laying in there.  I was sitting at the table working on my cellular biology homework (I hope you're reading this, Dr. Kincaid) when all of sudden I smelled smoke.  I muttered to myself, "Oh that's right, the oven has crap in it...." and turned around to see a flickering orange light in the oven window.  I opened up the door to find several piles of flaming debris; the flames were actually licking the bottom of the rack that was in the middle position.  I very calmly closed the door and walked in a circle while deciding what to do, and opted for grabbing the PUR water pitcher from the fridge and just dumping some of it in the oven to douse the flames.  A mushroom cloud of smoky steam billowed out and the flames were gone.  Tragedy avoided.  But then of course my hair smelled like smoke, and I wasn't going to go to school smelling like burnt oven detritus, so I had to take a shower and by then I was out of time to make the pie until I got back from school later that afternoon.

Luckily, I knew that making a big birthday dinner on a Friday night on a day when I had to go to school meant I would be running behind, so I prepared myself by going with a pre-made pie crust.  And the flames in the oven turned out to be quite a boon.  When I got back home, after reading the note that I wrote to myself and taped on the oven that said "DO NOT TURN ON UNTIL YOU CLEAN," I just opened the door and easily picked up the big chunks of burnt whatever, leaving an incredibly clean oven!  It was just like running the self cleaning cycle, except quicker and more exciting!


If I'm going to use a pre-made crust, I will only use the kind that you just unroll and put into your own pie pan because they actually taste quite a lot like a homemade crust.  The ones that are frozen into an aluminum pan are a non starter for me.  With the unroll and bake kind there are 2 in the package, so that left me with one that needed to be used after the pecan pie was done.  Hmm.... What kind of pie can I make that only takes a single crust?  Cherry!  With crumbs!  I saw this idea in one of my old cookbooks and immediately loved the concept.  It reminded me of the cherry dump cake my dad makes in a Dutch oven when he goes camping.  YUM.

So you're thinking, "so she's ok with pre-made pie crust, does that mean she's going to use a canned pie filling here?"  Oh. Hell. No.  Canned pie filling is a travesty.  For one thing, in any given can there are about 3 cherries and the rest is glop.  Furthermore, the glop is so sweet that it makes your teeth hurt.  Of course all my old cookbooks call for fresh cherries and then pitting them when making a cherry pie.  But this is October, which is lacking in fresh cherries, and I'm too lazy to pit them anyway, so I did use canned cherries, but then made my own filling out of them.  The filling is based on an old newspaper clipping that my mom has in her collection, and then I made a crumb topping along the lines of what you might find on a Dutch apple pie.  The result tastes wonderful, but I'm not going to lie - it makes a pretty sloppy looking piece.  Especially if you try to cut it before it has cooled thoroughly.  And when I say thoroughly I mean, like, for many hours.  So if you are really trying to impress someone and you want something that makes a beautiful presentation, this ain't it.  But the somewhat sweet, somewhat tart taste might just make you not care what it looks like.


Crumb Topped Cherry Pie

As I said, I used a pre-made pie crust but if you'd like to make one from scratch and don't have a recipe on hand, you can use the crust recipe from my peach pandowdy recipe.  Just make sure you roll it out big enough.  If you want your pie to set up more and make a little bit more presentable slice, you could try upping the tapioca by another tablespoon or so, but I would recommend that you first grind it in a food processor because you will definitely notice little white globules in the finished pie if you put in much more than I called for.  In fact, I noticed a minimal amount in my pie.  So if the idea of seeing any tapioca in there at all bothers you, you might want to grind it anyway.  (Measure first, then grind.)

One other note -  I know some pie plates are shallower than others so you may want to place the whole pie on a baking sheet when it goes in the oven just in case you have some bubbling over.  I did that, but mostly because I was gun shy about lighting the oven on fire again.

Filling

3 cans red, tart, pitted cherries (14.5 oz. each)
5 Tbs. cornstarch
1 to 1 1/4 cup sugar (use the lesser amount if you like it fairly tart)
dash salt
2 tsp. almond extract
3 Tbs. butter cut into 3 pieces
2 Tbs. instant tapioca

Crumb Topping

1 cup flour
6 Tbs. butter, melted and cooled
1 tsp. almond extract
dash salt

Preheat the oven to 375.  Put the pie crust into a pie pan and crimp the edges.  Line the crust with a few layers of foil and fill with pie weights.  Bake for 20 to 25 minutes or until lightly golden.  Meanwhile, prepare the filling.

Drain the cherries and reserve 1 1/4 cups of the juice.  (This will probably  be close to all of the juice but you should still measure to make sure.)  Set the cherries aside.  In a saucepan, combine the sugar, salt and cornstarch.  Whisk until there are no lumps of cornstarch.  Add the cherry juice to the saucepan and whisk to dissolve the sugar and cornstarch.  Cook over medium to medium-high heat, whisking often, until it boils and thickens and the juice turns from cloudy to clear.  Remove from the heat and stir in the butter and almond extract.  Once all of the butter is melted, stir in the cherries.  Add the tapioca and stir until well combined, let sit for 15 minutes.

For the crumb topping, mix all topping ingredients together and stir until well combined.  Use a fork to break up any large lumps.

Once the crust is done baking, remove the pie weights and fill the crust with the cherry filling.  Sprinkle with crumb topping and bake at 375 for another 40 to 45 minutes until the topping is golden brown.  If the pie crust starts to brown too much, you can use a pie crust shield to protect it.  Allow to cool for at least 2 hours before attempting to slice it.

Wednesday, October 12, 2011

Guest Post: Grandma’s Chicken and Dumpling Soup

Post by: Regina

[Regina and I work together, and got to know each other because there was a printer right outside of my cube.  Every time she came to pick up a printout we would chat for a while, and somehow managed to still chat even after we both had our cubes moved.  Well, technically the cubes are still in the same place but we were moved.  When work is slow we can easily spend the better part of the day looking for and emailing recipes to each other.]

I’m not actually sure of the provenance of this recipe.  It could in fact be a recipe from one of my own grandmothers.  At any rate, it’s a really tasty soup if you don’t mind that it takes the better part of a day to make. 
I have swapped out 2 cans of cream soup with a homemade version.  It adds another pot and a bit of time, but it is such an improvement.  I’m lactose intolerant, but with this substitution I was able to recreate the original soup, only tastier.   All of the veggie amounts below are rough.  I tend to use more than the amounts listed in the recipe so my husband and I don’t develop scurvy.  You can also use a slightly larger chicken, but increase the cooking time accordingly.  

Grandma’s Chicken and Dumpling Soup
Chicken broth: 
3-4 pound fryer chicken, cut up
6 cups cold water
3 chicken bouillon cubes (or 1 heaping Tbsp of chicken soup base from Penzeys)
6 peppercorns
3 whole cloves

Soup base:
Homemade condensed mushroom soup (recipe below; equal to 2 cans of creamed soup)
10 3/4 oz chicken broth
1 cup diced celery
1.5 cup thinly sliced carrots
1 large chopped onion
1 cup diced potatoes
1 bay leaf
1 cup fresh or frozen peas
1 tsp season salt

Condensed mushroom soup:
4 Tbsp unsalted butter (or margarine)
8 small mushrooms, minced (or run through food processor)
1/2 cup flour
2 cups milk (soy works fine)
2 cups chicken broth
Salt and pepper to taste

Dumplings:
2 cups AP flour
1 tsp salt
4 tsp baking powder
1/4 tsp pepper
1 egg, well beaten
2 Tbsp melted butter (or margarine)
2/3 cup milk (soy works fine)

Place fryer, water, bouillon, peppercorns, and cloves in a 5 quart dutch oven.  Bring to a boil.  Reduce heat and simmer until chicken is just cooked through.  (Chicken will cook again later so don’t get too paranoid). 

Remove chicken from the pot and let cool. 

Add soup base ingredients to pot. 

The condensed soup can be made at this time.

  • Melt the butter in a small sauce pan over medium-high seat. 
  • Add minced mushrooms and cook until softened.  Season with salt and pepper. 
  •  Sprinkle flour over mushrooms and whisk to combine.  Cook this mixture for about 5 minutes, whisking often. 
  • Add milk and broth to the mixture and bring to a boil, stirring frequently. 
  • Once everything has thickened to a creamy consistency, remove from heat and add to the soup base. 
Simmer all soup base ingredients for 2-3 hours over medium-low heat.  During that time, remove chicken from the bones and add the shredded chicken to the pot.  To avoid overcooking the chicken I tend to add it during the last hour of simmering.

30 minutes before you want to eat, make the dumplings.  Mix the flour, salt, baking powder, and pepper together. Add egg, butter, and milk to the dry ingredients.  You may need to add a bit more milk to make a moist, stiff batter.

Make sure the soup is at a low boil.  Drop teaspoons of batter into the soup.  The dumplings should be in a single layer and cover the entire pot.  Put the lid on immediately after dropping the last teaspoon.  Cook for 18 minutes without lifting the lid.  When you do open the lid, give the dumplings a poke.  If they seem solid they are done.

Eat. In my family whoever gets the whole peppercorns or cloves has to wash dishes that night.  My parents still don’t own a dishwasher. 

Tuesday, October 11, 2011

Open-Faced Egg Sandwich


So right after school was done kicking my butt (or at least the kicking had slowed down), my medical appointments started kicking my butt.  I've been off my feet a lot lately by doctor's orders, which means there's been much less cooking going on in our house than usual.  Actually, what's really been going on is probably something akin to what happens every week in Laura's house, where I made a big potful of something and we ate out of it for several days in a row so that my husband wouldn't have to work too hard to get dinner on the table.  This was self serving, too, because it also meant I didn't have to tell my husband what to do to get dinner on the table.  Sometimes that's almost more exhausting than just doing it myself, even though he means well.  :)  Luckily I've been sitting on this recipe for a while, so while I'm hanging out here on bedrest, or couchrest, as it were, for the remainder of the day, I thought I might as well share it.


I've mentioned before how much Marc and I love to have a big, guilty pleasure breakfast on the weekends, but besides things like sweets and simple carbs - coffee cakes, doughnuts, griddlecakes, etc. - most of my old cookbooks don't have much to offer as far as breakfast recipes.  Marc would always prefer to have a lot of protein in his big weekend breakfast, especially if that protein is in the form of bacon.  And cheese.  And eggs.  And then more bacon.  After a lot of paging through old books, I did find a few breakfast casserole and strata recipes, but it's nearly impossible to make something like that for 2 people, and I wasn't interested in eating it forever.  A little more scouring revealed several breakfast sandwich and scrambled egg recipes in a few old books from around the 30s and 40s.  One scrambled egg recipe contained oysters.  Another contained sauteed corn.  I decided I didn't know how to modernize something that sounded quite that repulsive, but was glad to hear that people were scrambling eggs back in the day because I knew I could work with that.  One book had a recipe for an egg sandwich and eggs benedict on the same page and hence the idea of an open-faced egg sandwich crept into my head.  That, plus the memory of a great meal at a bed and breakfast in the Poconos a few years ago created this tasty dish.  At this particular bed and breakfast, the scrambled eggs had herbs and a hint of garlic in them, and in this case, I actually gave in to a convenience product to get that same effect.


Open-Faced Egg Sandwich

I made this as 2 servings, but you would need to be pretty darn hungry to eat the whole thing.  Marc didn't have much trouble finishing his, but I could have probably shared mine with someone, especially if we'd had a little fruit salad or something like that to go along with it.  (As it was, the dog was happy to help me finish it.)  So I guess the point is it's probably not enough for 4 people as is, but a little more than needed for 2.  If you're interested in trying to make croissants from scratch, good on ya'.  I haven't tried that yet and luckily the grocery store bakery does a fine job of doing that for me.

2 croissants
1 Tbs. butter
4 eggs
1/8 tsp. salt
1/8 tsp. pepper
2 Tbs. soft cheese spread with garlic and herbs (I used Alouette Garlic and Herb Light)
4 strips thick cut bacon

Lay the croissant on the counter and place your palm flat on top of it.  Use a bread knife, held parallel to the counter, to cut each croissant in half horizontally.  Melt the butter in a 12-inch nonstick skillet until no longer foaming.  Place all 4 croissant halves, cut side down, in the skillet and cook over medium heat until they are nicely crisped.  Remove from the skillet and set aside.

In the now empty skillet, cook the 4 strips of bacon to desired crispiness and drain on paper towels.  Cut each slice in half.

Beat the eggs along with the salt and pepper.  Drain the grease from the bacon out of the skillet and pour in the egg mixture.  Add the 2 Tbs of cheese but do not just throw in 2 big gobs.  Spread it out around the pan so it can melt into the eggs evenly.  Scramble the eggs to desired doneness.

On each plate, place a bottom and top of a toasted croissant and place 2 of the halved strips of bacon on each piece.  (So each of the 4 croissant pieces will be covered with one piece of bacon, except that the bacon strip has been cut into 2 halves.  Got it?)  Evenly divide the scrambled eggs over all 4 croissant halves and serve immediately.

You will need a fork to eat this; you can't really pick it up.

Sunday, October 2, 2011

Stewed Apples


School has been kicking my butt the last few weeks, hence my lack of posting.  But I have no complaints because I can't imagine a better reason to be kept out of the kitchen than learning about bacteria.  If that sentence makes no sense to you, enroll in a microbiology class and tell me it's not fascinating.  So I've been away for too long and we've eaten too many frozen skillet dinners in that time, but for good reason.

Two really awesome things happened since I last posted.  One, Don't Ask Don't Tell officially bought the farm.  Good riddance to a hateful, discriminatory policy, in this lowly military spouse's opinion.  Two, fall arrived!  Let the apples roll!


As soon as I saw Jonathan apples at the store I knew it was time for stewed apples.  Jonathans are wonderful to cook with.  They are often as sweet as candy, and they break down into a great chunky applesauce type texture.  The combination of Jonathans and Granny Smiths together make for perfect stewed apples.  Incidentally, the next time I went to the grocery store after the Jonathans made their appearance, the Honeycrisps had arrived, which are one of my favorites for eating out of hand.  Man, I love apple season!

The combination of brown and white sugar might seem a bit fussy, but it's a great pairing.  The brown sugar gives a lovely caramely type flavor, but cutting it with the white sugar makes sure the flavor of the apples can still take center stage.  Finished off with a little cinnamon, cloves and nutmeg, it's like apple pie in a bowl.  These apples make a great side dish to a fall supper.  I served mine with cider glazed pork chops and roasted sweet potatoes and carrots.


Stewed Apples

3 cups peeled and chopped Granny Smith apples, about 3 apples
3 cups peeled and chopped Jonathan apples, about 3 apples
1/4 cup brown sugar
1/4 cup white sugar
1/3 cup apple cider
1 tsp. cinnamon
1/8 tsp. cloves
Pinch fresh ground nutmeg

Combine all ingredients in a large, heavy saucepan.  Bring to a simmer, turn heat to low and cook, covered, for about 45 minutes or until the Jonathan apples have broken down and the Granny Smiths are softened.

Monday, September 19, 2011

Chicken and Dumplings

The recipes I have for chicken and dumplings aren't antiquated, gross, or in need of updating.  The problem is that one of them needs some fancying up, and the other is too damn much work.

America's Test Kitchen has a fantastic chicken and dumplings recipe.  If you have all day to make dinner and have random 1/2 cups of chicken stock on hand, I highly suggest you seek it out.  If you're like me and hate cleaning splattered chicken grease off your stove and want to be able to kill some zombies and do some laundry on your Sunday afternoon, then this one is for you.

The biggest thing I am cutting out of the ATK recipe is browning the skin-on chicken thighs in multiple batches.  This would be the grease-splatter phase.  Undoubtedly it gives you a deeper flavor, but most of the time I'm willing to trade it in for ease.  (If you are trying to impress someone, brown those thighs.)  Instead I threw my thighs straight into the broth, and it was just fine.  Plus, the little city market I go to doesn't have a huge selection, so skin-on bone-in isn't an option for me unless I go to multiple stores, which I won't do.  Unless I need booze.  Then I'll do it.

The other disagreement I have with ATK is that they use drop dumplings.  My mom always made rolled dumplings, so I find the drop variety weird and kind of gross.  So hey, I guess there was something gross in here after all.  The rolled dumplings should be cooked in their own big pot of water though, because there's not enough liquid to cook them in the main pot.  If you are tempted to try this, let me tell you that you will end up with no dumplings and a really thick floury stew.  It's not *bad* exactly, but it sure as hell isn't dumplings.


However, the drawback of my mom's recipe is that it's pretty much what it says on the tin: chicken, and dumplings.  So in my constant battle against scurvy and vitamin deficiencies, I use the celery, carrots, and peas of the other recipe, but in greater (and standardly-packaged) quantities.  I have problems with recipes that call for less than the standard measure of ingredients, so I usually add or subtract until it's convenient.


Chicken and Dumplings

1 1/2 - 2 lbs trimmed boneless skinless chicken thighs
1 large onion, chopped
2 ribs celery, chopped
1 lb carrots, chopped
4-6 Tbsp flour, depending on how thick you want your stew
1/4 cup dry sherry
4 cups (2 lbs) chicken stock
1/2 cup milk
1 1/2 teaspoon fresh thyme, minced (or half quantity dried)
2 bay leaves
1 lb frozen peas
1/2 cup fresh parsley, chopped
salt and pepper to taste

Dumplings:
3 cups flour
4 tsp baking powder
1 1/2 tsp salt
1/3 cup chicken fat, skimmed from stew (alt: vegetable oil)
1+ cup milk

Saute onion and celery until the onion softens and starts to become transparent.  Add liquid ingredients, thyme, bay leaves, flour, and chicken thighs.  Simmer for one hour.

After an hour, add the carrots and skim as much fat off as you can.  Reserve the fat, just dump it right into your measuring cup and try to get at least 1/3 of a cup.  It's ok to get a little stock or thyme in there.  If using chicken fat grosses you out, substitute vegetable oil.  Also, start a large pot of water to boil for your dumplings.

Dumplings:
Combine dry ingredients in a large mixing bowl and stir together.  Add milk to your reserved fat until you have 1 1/3 cup liquid.  Stir into dry ingredients, adding more milk if needed.  Dough should hold together but not be wet.  Roll out 1/8" thick and cut into 1" squares.  Boil until they sink, about 15-20 minutes.

While the dumplings are cooking, remove chicken thighs to a plate or bowl and shred using two forks.  Add back into stew.  When dumplings are done, check carrots for doneness.  If they're ready, add dumplings directly to stew.  If not, drain them and let them hang out until the carrots are cooked and then add.

Remove from heat and add peas, parsley, and salt and pepper to taste.  Let sit until peas have come up to temperature, then tuck in.

Serves 6-8.

Sunday, September 18, 2011

Cocktail Night! - Brandy Alexander and Setting up your Home Bar


I'm on some medication right now that has to be taken by injection.  So far it hasn't really been a problem because Marc gives me the shots, and as long as I don't actually witness a needle piercing my skin, I don't have a problem with shots.  Well, I should have known this was coming someday, but Marc had to go out of town this weekend and I therefore had to give myself my own shot.  I practiced for a couple nights before he left so that he could catch me if I passed out, or hold my hair back if my stomach got a bit (ahem) unsettled.  It turned out to be fairly anticlimactic, but I was still terribly proud of myself for conquering that fear.  So on Saturday night when Marc was gone and I had to draw up my own injection and give myself the shot all by little old lonesome, I formulated the following if-then statement:

IF I successfully give myself my own shot, THEN I will have earned the right to eat a chocolate cupcake for dinner.

This is how my brain works.  Even my rewards are food-based.  And you have to admit, this is a pretty damn good prize.


You know what goes great with a decadent chocolate dessert?  Brandy Alexander.  This drink is another classic (circa early 20th century, I believe) that really doesn't need much tweaking because it's really good as-is, but I couldn't help myself from making a couple changes.  Speaking of as-is, the original version contains dark creme de cacao, heavy cream, and either brandy or cognac (which is just brandy made in a specific area of France).  To be honest, I've never tasted cognac and brandy back to back so I have no idea what subtle differences there are in the tastes.  I just keep brandy in my collection, and not even anything particularly top shelf.  I don't use it a whole heck of a lot, so just a cheapy, basic brandy suits me just fine.  I also don't have dark creme de cacao, just light, so that was what I used.  The major change I made was to substitute the heavy cream with ice cream, to make it even more creamy, cold and luscious.  Topped off with the traditional sprinkle of fresh ground nutmeg, it was seriously yummy, and not unlike having a nice cold glass of milk with my rich, chocolate cupcake.


Brandy Alexander

I would highly suggest chilling your cocktail glass in the freezer first, but of course that is optional.  I have one of those little Magic Bullet blenders and it is great for drinks like this where you aren't making a ton of stuff and don't want to get out your big blender.

1 scoop vanilla ice cream
1 oz. brandy or cognac
1 oz. creme de cacao
nutmeg

Combine all ingredients in a blender and blend until very smooth and creamy.  Pour into a chilled cocktail glass and garnish with a sprinkling of freshly ground nutmeg.


And now it's time to attend the Alcohol Academy.  Gather round, my cadets, and I shall tell you which things I find to be essential in my bar.  This came about because my good friend, Kriste, is setting up a new house and she asked my opinion about how to put together her home bar.  She suggested maybe I blog the answer so that others who might be wondering the same thing can also be schooled.  So here are some of my favorite items that I use a lot.

Gadgets


There is a plethora of gadgets and tools you can buy for your bar, but I have just a few that I really use a lot.  First off being the shaker.  Ours is Calphalon brand and it works great.  It never leaks, and the holes are big enough that you don't end up with liquid sitting on top of the shaker from the surface tension.  Plus it looks pretty.  You can also buy a Boston shaker, which is the kind with the metal and glass halves that fit into each other for shaking, and the kind I believe real bartenders prefer.  You'll also need a separate strainer in that case.  I prefer my cobbler style shaker because, as we discussed, I am not a real bartender.  Our shaker also came with the jigger you see which measures 3/4 oz on one side and 1 1/2 oz on the other side.  Marc likes to use the jigger but I almost never use it.  I like to use the little measuring glass you see there.  It measures up to 4 oz and also has markings for Tablespoon, teaspoon and mL measurements.  One tool I would never give up is the citrus squeezer.  You just cut your citrus in half, place it cut side down and squeeze.  It lets the juice through while keeping the pulp and seeds contained.  I use it constantly in the kitchen for cooking and cocktails.  You can get ones even bigger than the one in the picture that supposedly fit oranges.  The last essential tools are a sharp knife and a cutting board.  In my opinion, you can get away without having anything else and still make great drinks.

Glasses


Without a doubt, the glasses we use the most are the old fashioned glasses (small one in the left foreground).  These are short glasses with a big, heavy base and usually around 6 to 8 ounces.  Ours are a little bigger than that, so we just compensate by not quite filling them up all the way when the directions are to "top up."  The second most commonly used glasses in our arsenal are the cocktail glasses (one in the foreground on the right and the background on the right).  These are the ones that people tend to think of as martini glasses.  We tend to use the stemless ones because we think they're cool looking and because they have a good, heavy base.  The tall ones are really fragile, and we've already had one break in our last move, so they don't get used as much as the little ones.  Margarita glasses are easily done without, in my opinion.  They are indeed nice to have if you're drinking margaritas, but it's not like you can't put your margarita in a highball glass.  Speaking of which, the highball is the one in the background left and we use those fairly often as well.  They are typically around 10 or 12 ounces.  Again, ours are a little big but that can be worked around.

Mixers and Garnishes


Lemons and limes are crucial.  I always keep them on hand, and in the cases when I happen to run out, their absence is felt immediately.  Juices are another great thing to keep on hand, particularly cranberry and pineapple.  I like to have oranges occasionally, but I don't use them quite as often as lemons and limes.  As far as sodas (or "pop" as they say around the KC area) I always keep cola and a white soda on hand, and I vastly prefer 7 Up over Sprite and Sierra Mist because it's not as sweet.  Grenadine, cream of coconut and maraschino cherries are nice to have on hand, too, and certainly not that big of an investment.

Alcohol


And now the important part!  If I had a tiny apartment or a tiny budget, my bar would consist of the following: Triple Sec, vodka, rum, gin, tequila, and bourbon or whiskey.  You can make a lot of stuff from this limited selection, and you don't have to spend a lot of money.  Bombay Sapphire and Knob Creek aren't cheap, but you can get something of lesser quality and be fine if you're goal is mixing.  My picture just represents what I have in my collection.  If you want a good sipping bourbon though, the Knob Creek is really good.  I really prefer 100% agave tequila, but just a regular old bottle of gold tequila can work just fine, too.

And there you have it!  I could go on and on, but these are some basics that can get anybody started.  Especially you, Kriste.  :)

Sunday, September 11, 2011

Apple Roll


Would you like a piece of apple roll?  I'll answer for you.  YES.

Fall is just a few weeks away and I freaking love fall.  The crisp, cool air and the jackets on chilly nights, the changing leaves, the respite after months of ridiculous heat and humidity....  Ahhhh......  Love it.

I have a very sweet friend, Lindsey, who just started her own company making some delectable creations called cake balls.  Remember how I don't like the word balls associated with my food?  When balls is preceded by the word cake, I'm totally on board.  Besides, check out these things she makes!  They're gorgeous!  If you live in St. Louis metro area and you need a unique treat for a wedding or shower, please give Lindsey a call.  But I digress.  I remember from way back when in maybe 5th grade or so, I was complaining about how hot it was in the summer to Lindsey's mom, Bev.  Bev was a teacher, and full of worldly wisdom.  I remember she said to me, "We live in the Midwest because we love all four seasons."  True.  Of course Bev didn't mention that sometimes we get all four seasons in one day, but her point remains valid.  Every season brings its own special treats, especially in the kitchen.  Autumn is an awesome time to cook.  Pot roast with root veggies, roasted sweet taters and carrots, maybe some baked acorn squash with a little butter and brown sugar, or my favorite, apples.  I love to cook with apples.  So even though fall isn't quite here yet, I wanted to get a jump on apple cooking with this tasty creation.


I discovered a recipe for something called Apple Roll in an old cookbook called The Victory Handbook for Health and Home Defense loaned to me by my father-in-law.  This little cookbook is a World War II era gem which I am sure I will mention again in the future.  It's the only cookbook I've ever seen that explains how to properly display the American flag.  It also contains a list of ways to help conserve sugar for the war effort, such as to "educate your family in the spoon-stirring club," as undissolved sugar at the bottom of your cup of tea or coffee is wasteful.  Can you imagine our entire country being so united now that we would cooperate with having our coffee or our sugar or our gasoline rationed?  It's almost impossible to fathom my generation making a cake with honey instead of sugar, or saving a tiny bit of grease from a package of bacon so that it could be used to make explosives.  It almost seems romantic.  But maybe I say that because I happen to be married to one of the 1% of the population that has actually been asked to sacrifice anything as a result of a decade's worth of war.   But again, I digress....


Once I saw the Apple Roll recipe listed in the Victory Handbook, I noticed that it popped up in a couple other places.  One book called it Apple Roly Poly.  All the books where I found it were of the 1940s and 50s vintage, and they all called for a dough made from biscuit mix.  The dough was rolled out into a rectangle, then apples, sugar and cinnamon were sprinkled all over and the entire thing was rolled up and sliced into pinwheels.  I loved the idea, I just didn't like the biscuit mix thing.  I decided to roll mine up in a flakier, pastry type dough.  More like what you might use for a turnover.  I also decided to cook the apples a bit first to drive off a bit of their moisture.  But to make sure they didn't just turn to mush, I used Granny Smiths, which hold up really well to cooking and have a pleasant tart flavor.  After all that, my filling was still a little too juicy, but I didn't want to get rid of all that yummy, sugary, cinnamony flavor.  So I separated the apples from the cinnamony goo and put that in the bottom of the baking pan, and then placed my little apple pinwheels into it to bake.  After letting them cool for a few minutes, I decided to guild the lily a bit by drizzling them with a bit of icing.  The result was a bit like a cinnamon roll with apples in it, and that is exactly as awesome as it sounds.  Enjoy!


Apple Roll

You'll need to give the dough at least an hour to chill after you prepare it, or you could start well in advance (or even a day ahead) if you like.  I actually made my dough and filling in the morning, stuck them in the fridge during the day while I ran my errands, and then assembled and baked it in the evening.  An apple corer / slicer is a good gadget to have for a dessert like this, and if you're in the market for one, I suggest this version.  It's a great little tool because it can do 8 or 16 slices and it's super sharp.

Dough

2 cups flour
3/4 tsp. salt
1 cup butter, divided use
1/2 cup ice water, +/- a Tbs. or 2 more

Filling

3 cups diced Granny Smith apples, about 2 to 3 apples, depending on size
4 Tbs. butter
1/2 cup brown sugar, packed
1 tsp. cinnamon
1/4 tsp. allspice

Icing

3/4 cup powdered sugar
1 Tbs. milk

Cube 1/2 cup (1 stick) of the butter and place the cubes onto a plate.  Freeze for 15 minutes.  Combine flour and salt in a food processor and process until well combined. Scatter the cold butter cubes over the flour in the food processor and pulse until the mixture becomes crumbly.  Pour the flour and butter mixture into a bowl.  Add the ice water, starting with 1/2 cup and stir to combine until the dough comes together.  If it seems very dry, add a bit more water a little at a time until it just comes together.

Flour your counter top, rolling pin and hands and roll the dough into a 10" x 18" rectangle.  The first time you roll it out it will probably be pretty oddly shaped; just get it as close as you can.  It will form a better rectangle each time you roll it out.  Take 1/4 cup of the remaining butter (half a stick) and place little slices of it all over the dough.  Fold one third of the dough over onto itself, then fold the other third on top of that.  (See my picture below to see how I positioned the little slices of butter, and to see the first third of the dough folded over.)  Turn the dough 90 degrees and roll out again into a 10" x 18" rectangle.  Repeat the process with the remaining 1/4 cup of butter, then fold into thirds and roll out again into another rectangle.  (It ought to look pretty rectangular by now.)  Fold up again by thirds, then fold in half.  Wrap your little square of dough in some plastic wrap and chill for at least 1 hour.

For the filling, heat the 4 Tbs. of butter in a 12-inch skillet.  Once the butter is hot and has stopped foaming, add the apples and saute for several minutes until softened.  Add the brown sugar, cinnamon and allspice and cook over medium heat, stirring occasionally, until sauce has thickened a bit.  Remove from the heat and strain the sauce into a small bowl.  Set the apples and sauce aside until the dough has finished chilling.

When ready to assemble, preheat the oven to 425 and place an oven rack in the middle position.  Remove the dough from the refrigerator and let it set at room temperature for 10 or 15 minutes.  Spray a 9" x 13" baking dish with cooking spray and then spread the brown sugar / butter sauce evenly over the bottom of the pan.  Mix the icing ingredients together and set aside.

Roll the dough out into a 10" x 18" rectangle one last time.  Lay the dough on the counter top so that the short side is parallel to the edge of the counter and the long sides are perpendicular to it.  Sprinkle the apples evenly over the entire surface, leaving a few inches bare at the very top of the rectangle (the short edge furthest away from you).  Roll the dough up tightly and pinch the end to seal it as best you can.  Use a very sharp knife to slice the roll into 12 equal pieces and place each roll into the baking dish.  Bake for 20 to 25 minutes or until dough appears to be flaking into layers.  Cool in the pan for 10 minutes, then remove to a serving platter, flipping each pinwheel over so that the saucy part is on top.  Let cool an additional 30 minutes, drizzle with icing and serve.